Personal computing discussed

Moderators: askfranklin, renee, emkubed, Captain Ned

  • 1
  • 4
  • 5
  • 6
  • 7
  • 8
  • 9
 
just brew it!
Administrator
Posts: 54500
Joined: Tue Aug 20, 2002 10:51 pm
Location: Somewhere, having a beer

Re: Stumbled on a new project this weekend.

Thu May 09, 2019 9:14 am

Many jobs ago we dealt with a system that had hundreds of boards (similar to blade servers) plugged into large rack-mounted backplanes. The manufacturer they contracted to build the boards had poor quality control, resulting in boards with bad solder joints which would work intermittently. SOP for figuring out which boards had issues was to run a massage vibrator across the exposed edges of all of the boards while the system was running a test workload. Any with bad solder joints would immediately crash or otherwise misbehave, and were pulled and reflowed.
Nostalgia isn't what it used to be.
 
The Egg
Minister of Gerbil Affairs
Posts: 2938
Joined: Sun Apr 06, 2008 4:46 pm

Re: Stumbled on a new project this weekend.

Thu May 09, 2019 9:46 am

just brew it! wrote:
Many jobs ago we dealt with a system that had hundreds of boards (similar to blade servers) plugged into large rack-mounted backplanes. The manufacturer they contracted to build the boards had poor quality control, resulting in boards with bad solder joints which would work intermittently. SOP for figuring out which boards had issues was to run a massage vibrator across the exposed edges of all of the boards while the system was running a test workload. Any with bad solder joints would immediately crash or otherwise misbehave, and were pulled and reflowed.

Who provided the equipment? I hope you washed your hands afterwards.
 
Glorious
Gerbilus Supremus
Posts: 12343
Joined: Tue Aug 27, 2002 6:35 pm

Re: Stumbled on a new project this weekend.

Thu May 09, 2019 9:55 am

haha
 
SuperSpy
Minister of Gerbil Affairs
Posts: 2403
Joined: Thu Sep 12, 2002 9:34 pm
Location: TR Forums

Re: Stumbled on a new project this weekend.

Thu May 09, 2019 12:00 pm

The Egg wrote:
I hope you washed your hands afterwards.

Image
Desktop: i7-4790K @4.8 GHz | 32 GB | EVGA Gefore 1060 | Windows 10 x64
Laptop: MacBook Pro 2017 2.9GHz | 16 GB | Radeon Pro 560
 
thegleek
Darth Gerbil
Posts: 7460
Joined: Tue Jun 10, 2003 11:06 am
Location: Detroit, MI
Contact:

Re: Stumbled on a new project this weekend.

Sat May 11, 2019 9:37 am

just brew it! wrote:
SOP for figuring out which boards had issues was to run a massage vibrator across the exposed edges of all of the boards while the system was running a test workload.


Hitachi?
––•–√\/––√\/––•–– nostalgia is an emotion for people with no future ––•–√\/––√\/––•–-
 
just brew it!
Administrator
Posts: 54500
Joined: Tue Aug 20, 2002 10:51 pm
Location: Somewhere, having a beer

Re: Stumbled on a new project this weekend.

Sat May 11, 2019 10:46 am

thegleek wrote:
just brew it! wrote:
SOP for figuring out which boards had issues was to run a massage vibrator across the exposed edges of all of the boards while the system was running a test workload.

Hitachi?

Yeah, pretty sure it was one of the "Magic Wand" models (or whatever they were called back then). IIRC the hardware engineer who came up with the idea would leave it sitting out on the workbench just to weird people out.
Nostalgia isn't what it used to be.
 
MileageMayVary
Gerbil XP
Posts: 370
Joined: Thu Dec 10, 2015 9:18 am
Location: Baltimore

Re: Stumbled on a new project this weekend.

Mon May 13, 2019 11:33 am

Winner: best non-conventional IT tool.
Main rig: Ryzen 3600X, R9 290@1100MHz, 16GB@2933MHz, 1080-1440-1080 Ultrasharps.
 
ludi
Lord High Gerbil
Posts: 8646
Joined: Fri Jun 21, 2002 10:47 pm
Location: Sunny Colorado front range

Re: Stumbled on a new project this weekend.

Mon May 13, 2019 11:54 am

MileageMayVary wrote:
Winner: best non-conventional IT tool.

"Hello, booking? I would like a one-way ticket to unemployment, with a layover at HR...yes, I'll hold."
Abacus Model 2.5 | Quad-Row FX with 256 Cherry Red Slider Beads | Applewood Frame | Water Cooling by Brita Filtration
 
SecretSquirrel
Minister of Gerbil Affairs
Topic Author
Posts: 2726
Joined: Tue Jan 01, 2002 7:00 pm
Location: North DFW suburb...
Contact:

Re: Stumbled on a new project this weekend.

Mon May 13, 2019 3:45 pm

Something of a cross post from my 3d printing thread, but I'm making good progress on creating replacement plastic parts for the Pac Man style joystick. Originals on the right, reproductions on the left.

Image

Printed from red nylon 6. I need to redo the actuator plate design (rectangular part) as I found that the internal walls were sloped at a 12deg angle when I was verifying dimensions of my repo against the original. Need to incorporate that slope.

Don't have pictures right off hand, but I pulled the t-moulding out of the cabinet. Luckily it wasn't glue anywhere and came right out.

--SS
 
SecretSquirrel
Minister of Gerbil Affairs
Topic Author
Posts: 2726
Joined: Tue Jan 01, 2002 7:00 pm
Location: North DFW suburb...
Contact:

Re: Stumbled on a new project this weekend.

Mon May 27, 2019 10:25 am

Got to give Ms Pac some love this weekend. No pictures yet though.

Re-sanded everything with 120 grit for a much nicer surface. Went around all the corners and hard to reach places with an oscillating multitool with a sanding attachment. Everything that will be repainted is now sanded. Started with the Bondo. I always forget how quickly the stuff starts to set. Luckily the front edges of the cabinet are in very good shape as the T moulding protected them well. The back and bottom, not so much, especially on the left side. Got the first round on Bondo done and sanded, on the left side. Will probably need one more round to finish out the edges. Should get the whole cabinet Bondoed today.

I'm a little behind with I wanted to do this weekend. Friday was a company holiday for me, but I ended up taking an unexpected drive in the afternoon (couple hours each way). An opportunity popped up that I couldn't pass on.

Image

Needs a bit of electronics TLC, but is playable. Displays double text and the bottom "life count" and level sprites are doubled up as well. Sound will occasionally cut out. The cabinet itself is in fair shape. The original art was just painted over but is all sorts of torn up. Galaga art is a vinyl sticker and the game came with a new set. I could get away with just sticking it on, but I'll probably sand and repaint at some point. The control panel has a new, very poorly applied, overlay on it. The only cabinet work needed, other than painting, is to replace the bottom, which is particle board and a bit worse for the wear. Still. it playable and probably won't get much done until Ms Pac is done.

--SS
 
ludi
Lord High Gerbil
Posts: 8646
Joined: Fri Jun 21, 2002 10:47 pm
Location: Sunny Colorado front range

Re: Stumbled on a new project this weekend.

Mon May 27, 2019 2:43 pm

That man's playing Galaga. Thought we wouldn't notice. But we did.
Abacus Model 2.5 | Quad-Row FX with 256 Cherry Red Slider Beads | Applewood Frame | Water Cooling by Brita Filtration
 
SecretSquirrel
Minister of Gerbil Affairs
Topic Author
Posts: 2726
Joined: Tue Jan 01, 2002 7:00 pm
Location: North DFW suburb...
Contact:

Re: Stumbled on a new project this weekend.

Thu May 30, 2019 7:31 am

The left side wasn't too bad. Mainly the back edge. The back, bottom, left corner did need a lot of work. It was almost bad enough to need a small section of plywood replaced. But, as long the cabinet doesn't get tilted over on that corner, the Bondo will suffice.

Image

Image

While the particle board above and behind the monitor is just flat black, it was so rough, even after sanding that I went ahead and filled it as well. I'm pretty sure that at some point it had gotten wet. Not soaked, but sufficient spray to make the surface bubble in various places.

Image

The right side had the most dings and defect, though some of them were actually just in the original plywood. There were some cracks and seams in the top layer. Back edge needed a good bit as well, same as the other side.

Image

Originally, I started out trying to be judicious with the Bondo and trying to put a bit of feathering on the edges and the like. Quickly came to the conclusion that is was much easier to just get the spot covered and roughly smooth and let power tools take care of the rest.

One of the roughest post on the cabinet was the area routed for the door. Makes sense, but also the hardest area to address. I did some touch up on it where there were big areas splitting apart. But I didn't spend too much time on it as it will never be visible, and by the looks of it, wasn't perfect (or close) to begin with.

Image

Image

Image

Now, more sanding! Yay!

Actually, the random orbital with 120 grit does a really good job of smoothing out the Bondo.

Image

Image

Image

Image

This picture should give you an idea of just how rough the particle board was. This is after sanding, and it is generally smooth when you run your hand over it now.

Image

More pictures.

Image

Image

Image

This is the bottom, back, left corner that needed so much filler. It turned out pretty decent, in the end.

Image

I do have a few places that need a little more work.

Image

And I think I need to go over all the edges with wood hardener as it has a tendency to splinter if you even look at it wrong. The spot on the edge in this picture occurred while I was sanding. Very annoying, but 30+ year old plywood is definitely fragile.

Image

So I've got one more pass of Bondo to do. I need to get the Galaga moved out of the garage to free up space so I can put up a temporary paint booth. Then I can finally start painting this thing. The stencils haven't arrived yet, so its not a huge rush since I couldn't go past the base blue right now anyway, but I have another trip coming up in mid June, and it's possible that I'm only home three or four days in July, so time for projects is going to be rather limited for a while.

--SS
 
SecretSquirrel
Minister of Gerbil Affairs
Topic Author
Posts: 2726
Joined: Tue Jan 01, 2002 7:00 pm
Location: North DFW suburb...
Contact:

Re: Stumbled on a new project this weekend.

Sun Sep 15, 2019 4:35 pm

It's been a busy, busy summer -- a trip to Colorado, a trip to Costa Rica, four trips to California, an unexpected trip to New Orleans over Labor Day... I have managed to get a bit of time here and there to work on Ms Pacman.

I got the pinball machine and Galaga moved upstairs to the family room.

Image

If I am ever lucky enough to get to build a house from scratch, the game room will be on the first floor! The pin was the easier of the two. Took the back box off and playfield out and moved it up in pieces. Galaga... well, even with the display removed, it is still one heavy beast. Found out that the cabinet definitely needs to TLC, despite looking pretty ok on the outside. Not structurally unsound at this point, but I won't be moving it around unless absolutely required.

Image

Getting back to the cabinet, I went over all the edges with wood hardener.

Image

Image

Image

Image

Image

Also did another round of Bondo and sanding.

This weekend was a huge milestone in this project. First paint!!!

Image

Image

Image

Image

Image

Just the first coat of primer but it's a huge step. Paint is Kilz 3 primer mixed with Floetrol in about an 8/1 ratio. I rolled it on with a high density foam roller. There will definitely be some sanding involved, but the primer is way to thick to spray.

--SS
 
SecretSquirrel
Minister of Gerbil Affairs
Topic Author
Posts: 2726
Joined: Tue Jan 01, 2002 7:00 pm
Location: North DFW suburb...
Contact:

Re: Stumbled on a new project this weekend.

Sun Sep 15, 2019 4:58 pm

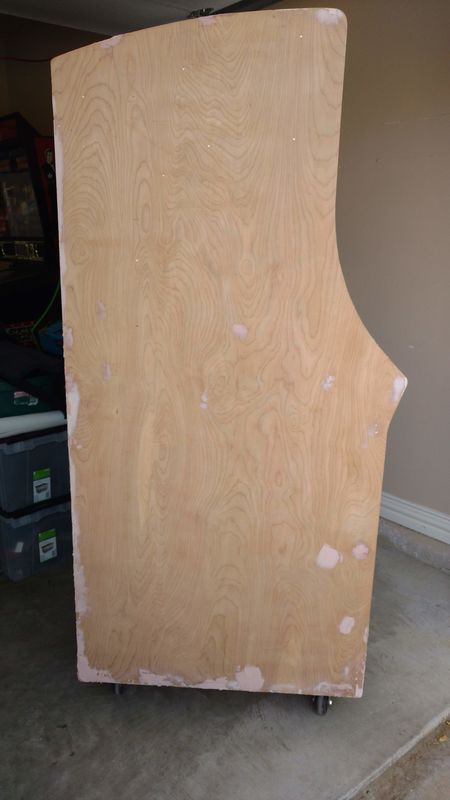
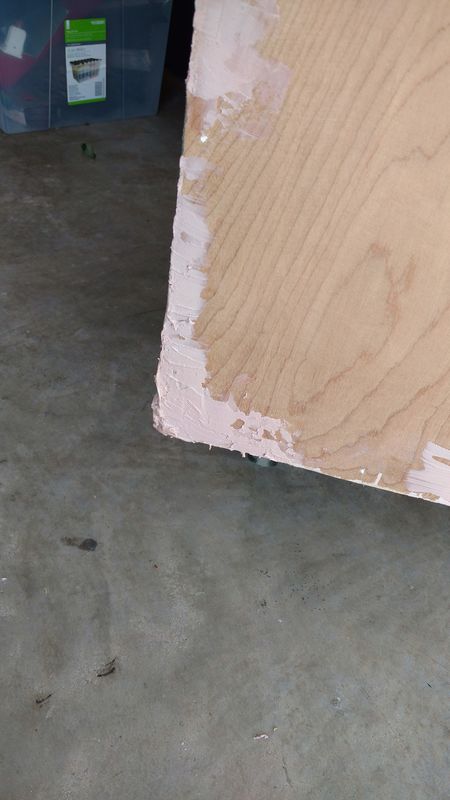
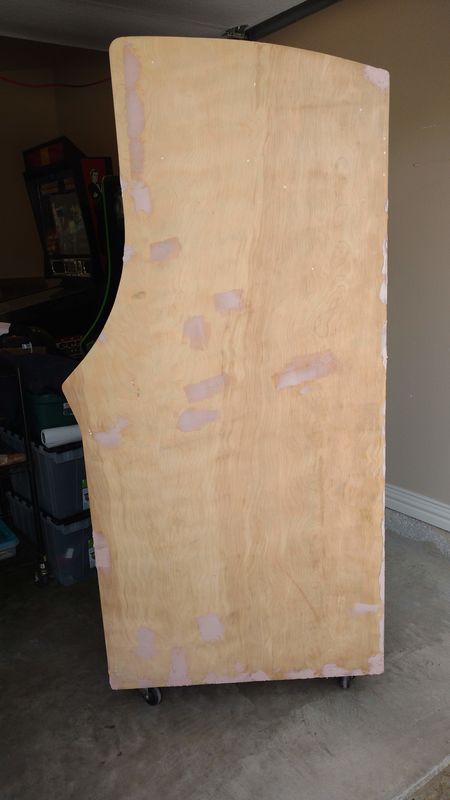
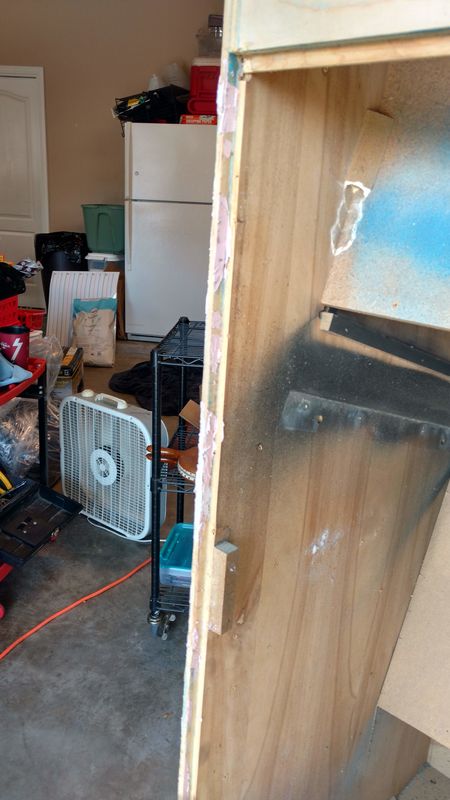
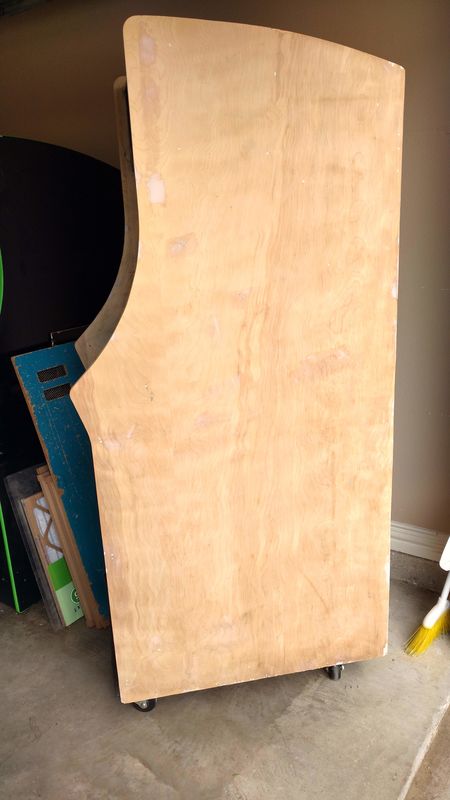
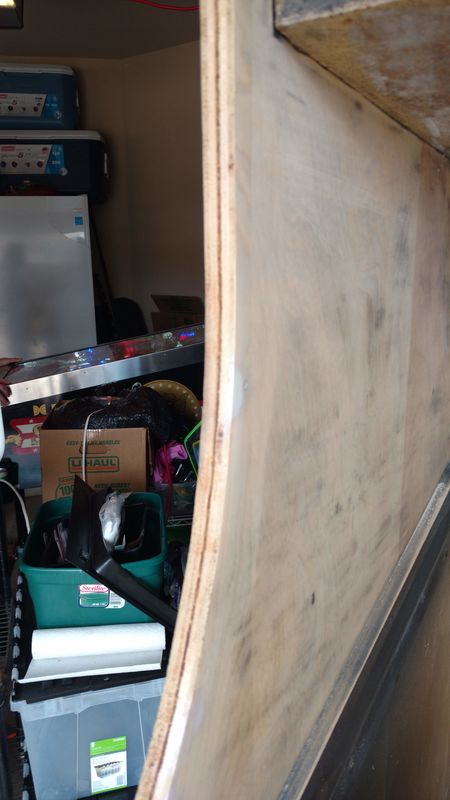
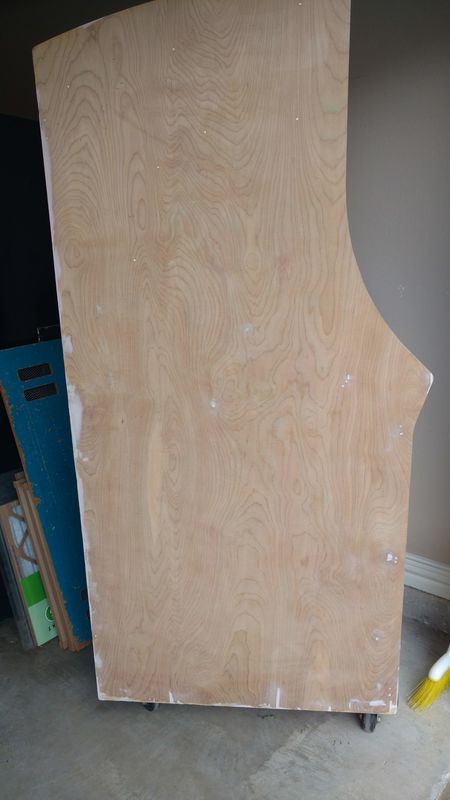
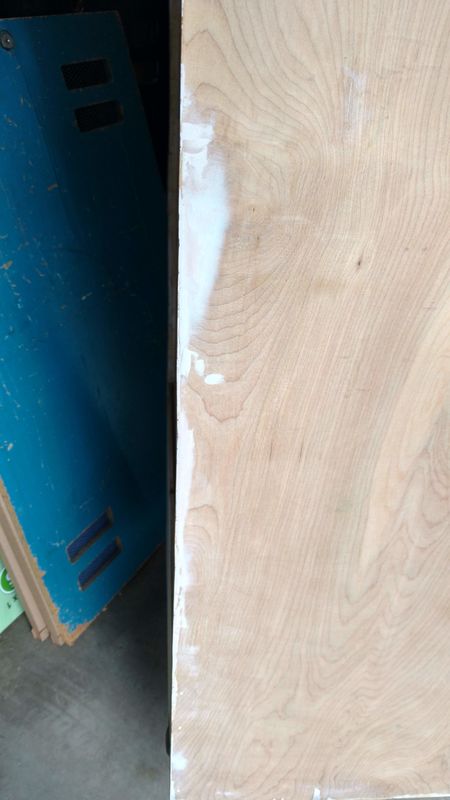
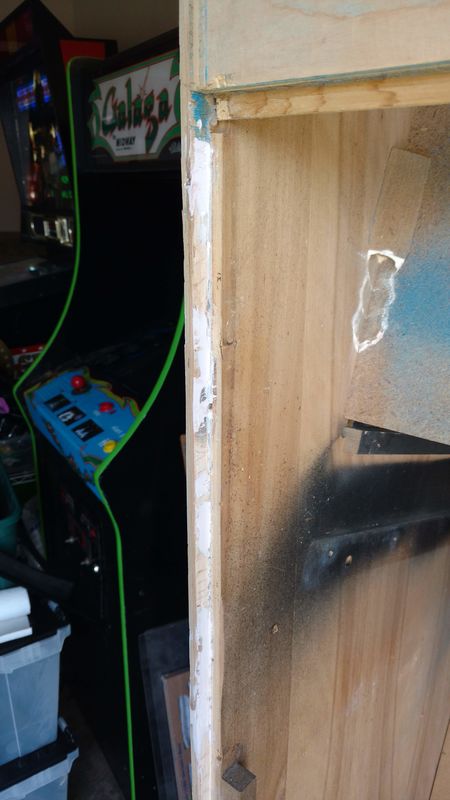
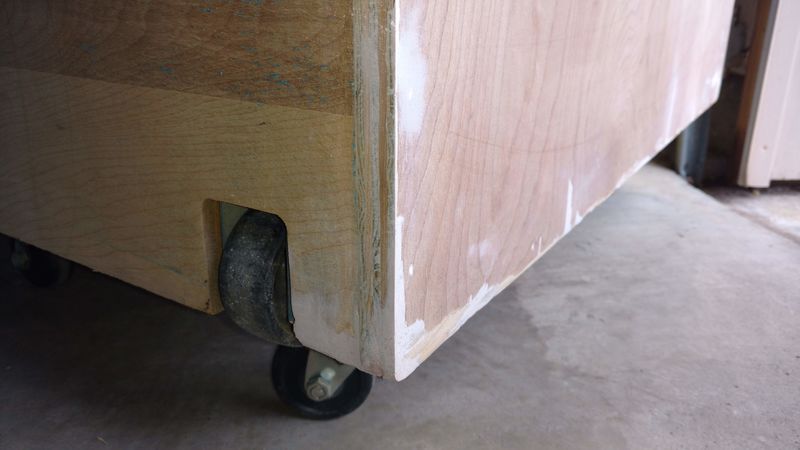
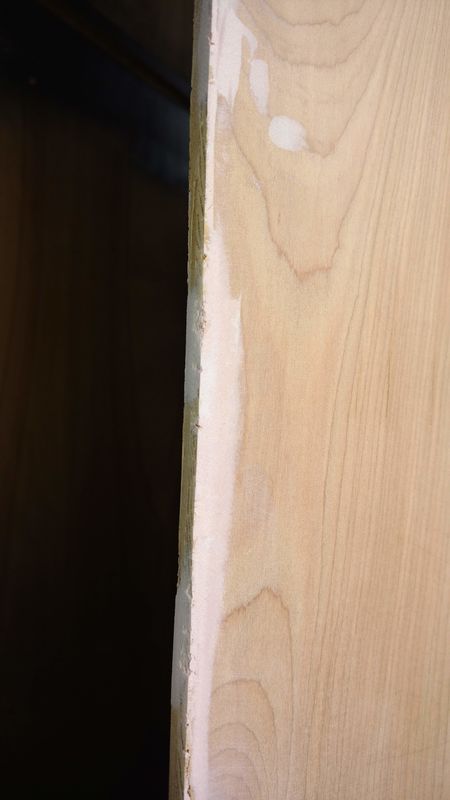
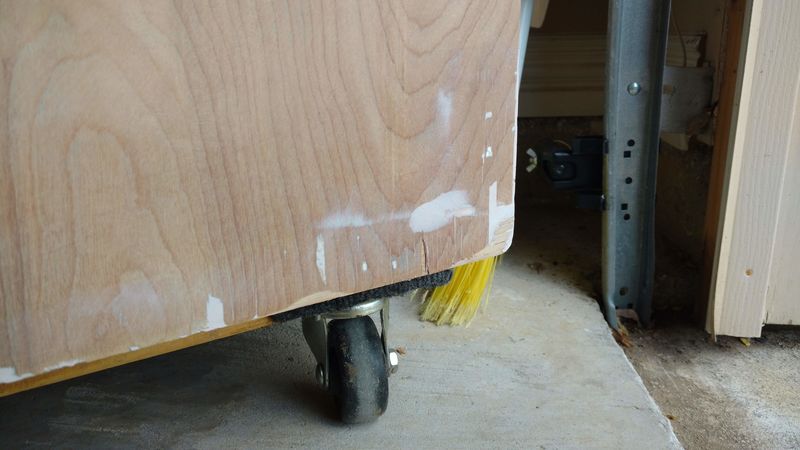
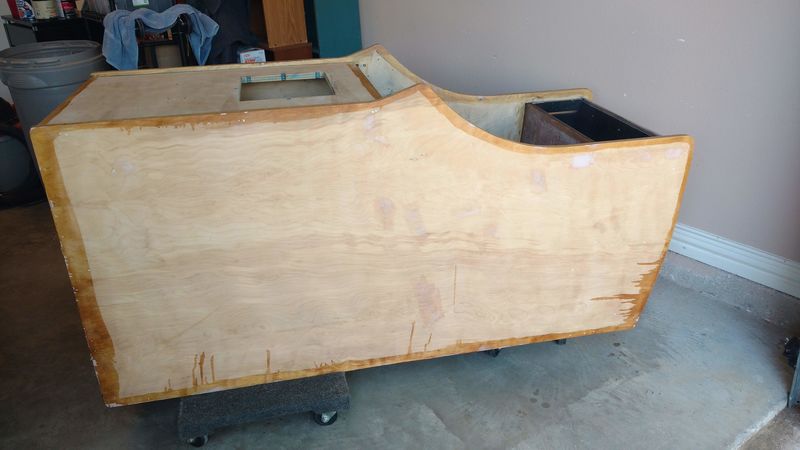
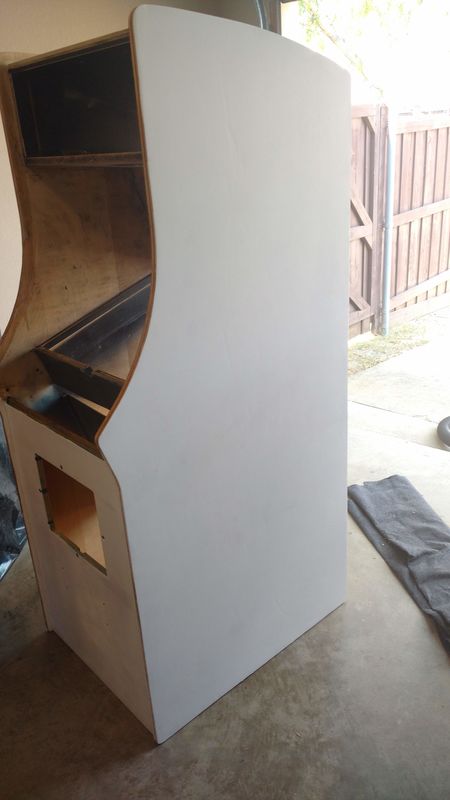
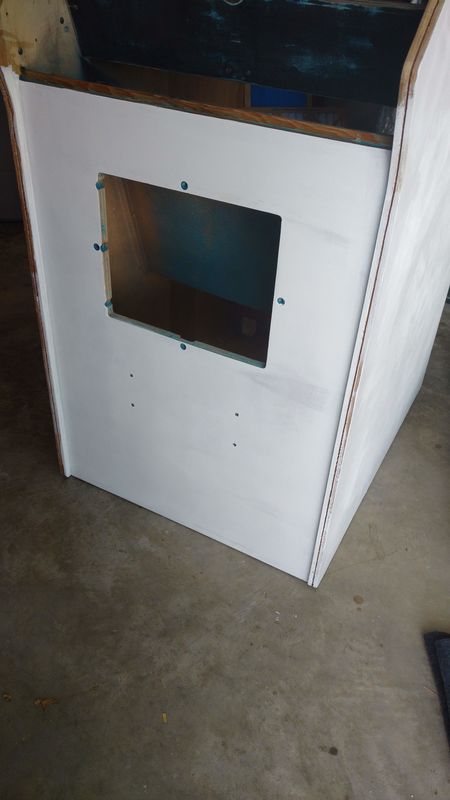
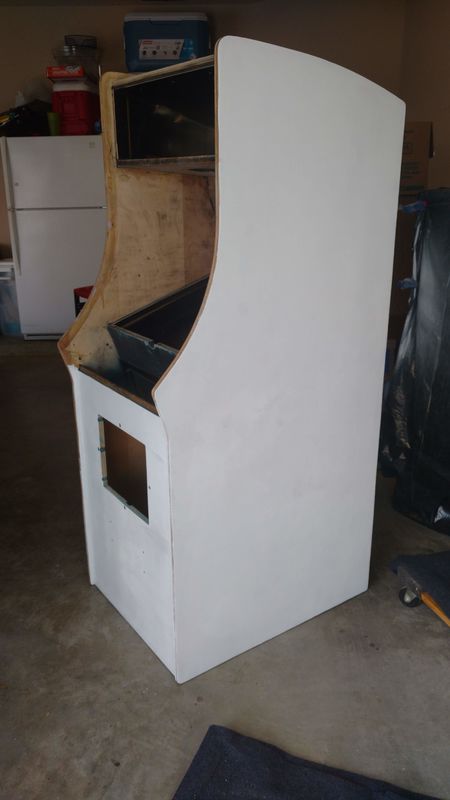
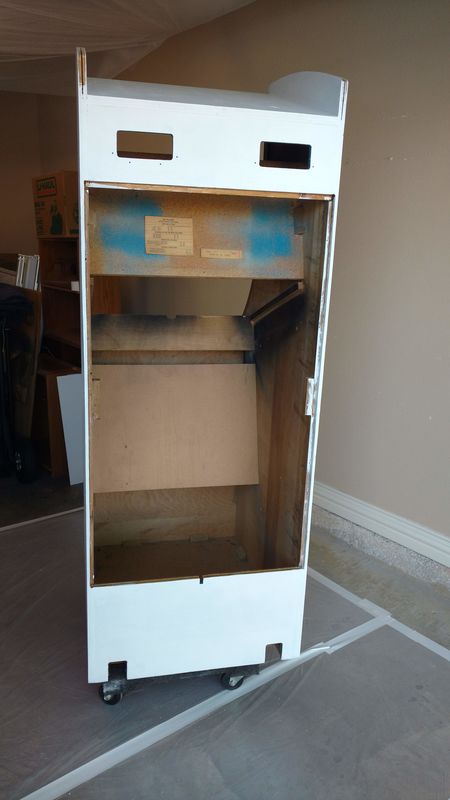
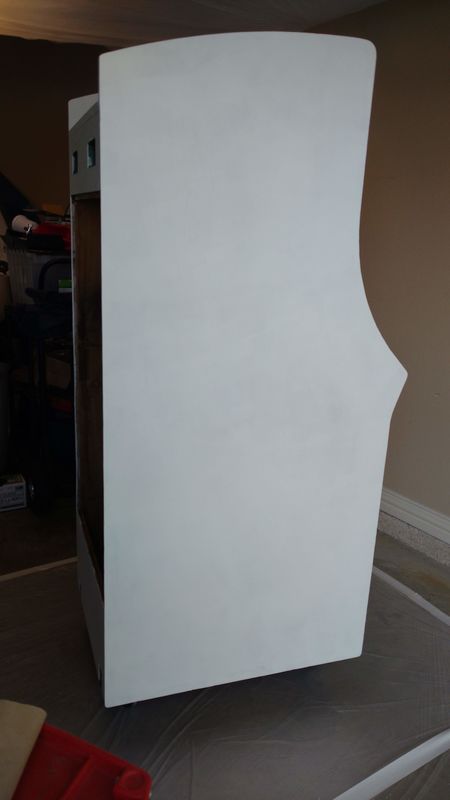
The left side is definitely nicer than the right. Priming the right side exposed spots that might need to be filled before the next layer of paint. I'll make that call after sanding.

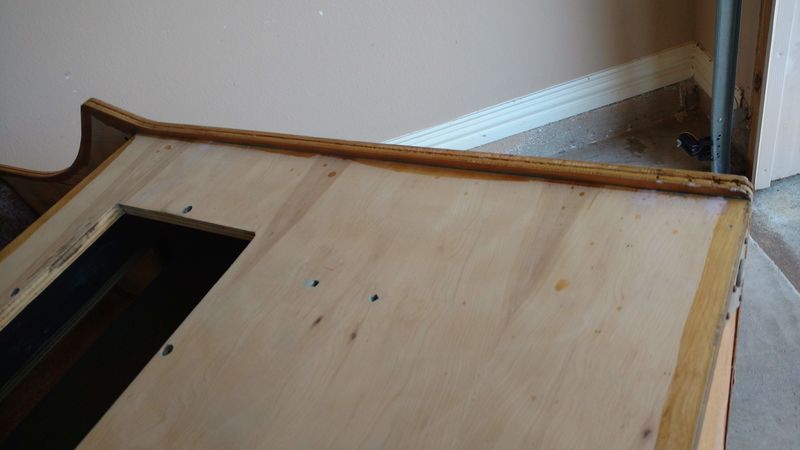
Working on the cabinet is a bit more involved and takes some time to get moving and get cleaned up. Some of the little bits of time I've had have been spent working on the second board that was in the bottom of this cabinet when I got it.

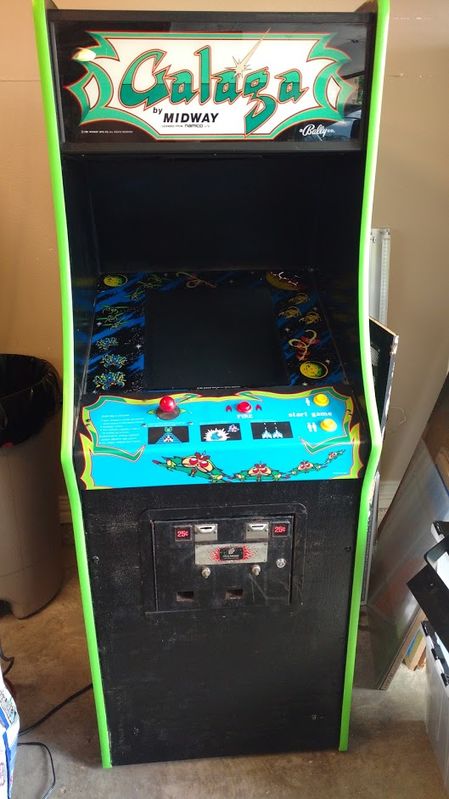
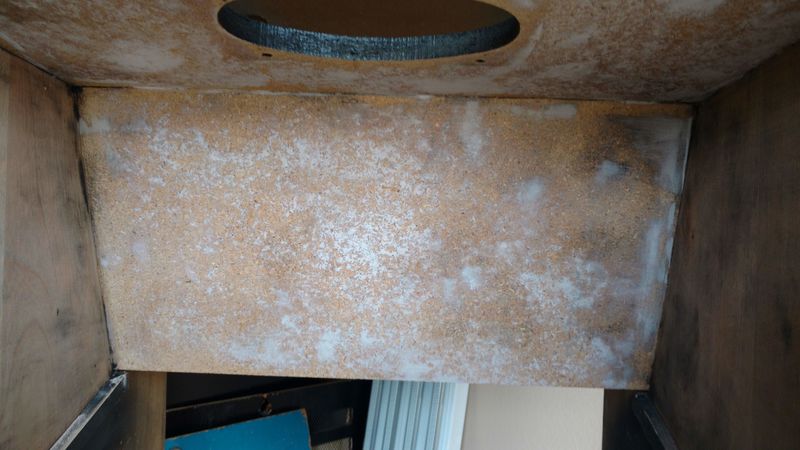
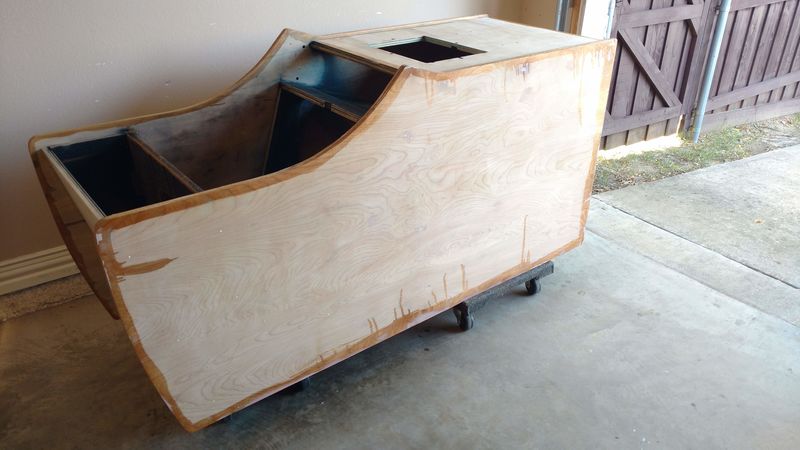
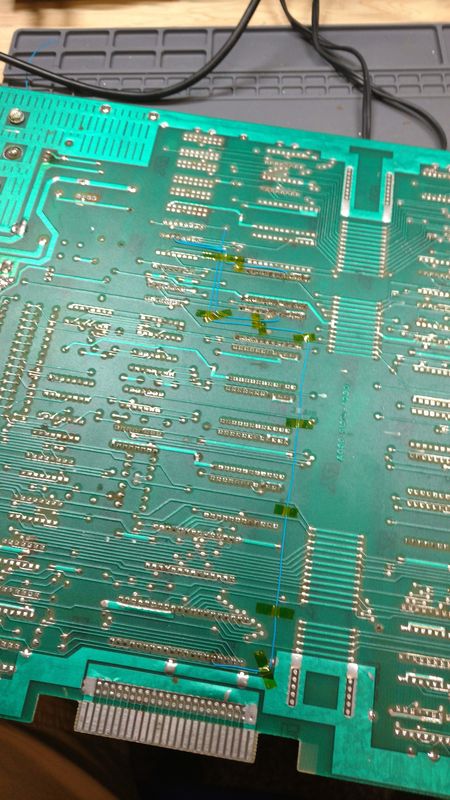
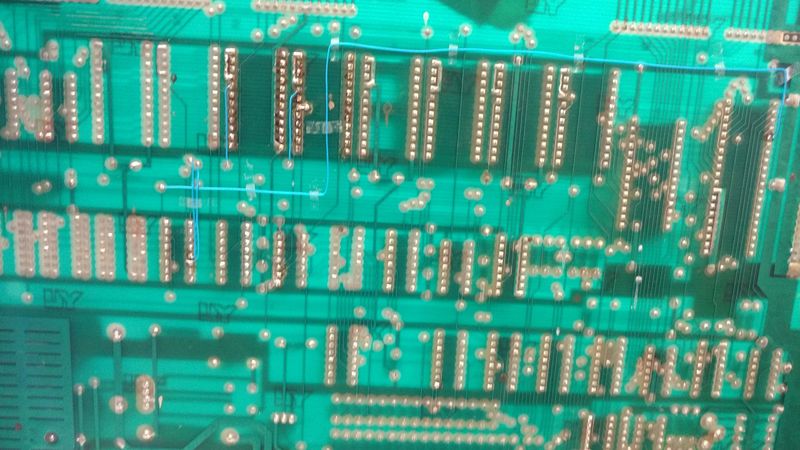
As a reminder, this is what it looked like when I got it. Someone had attempted to convert it to a multi-pac game and did a poor job of it.

Image

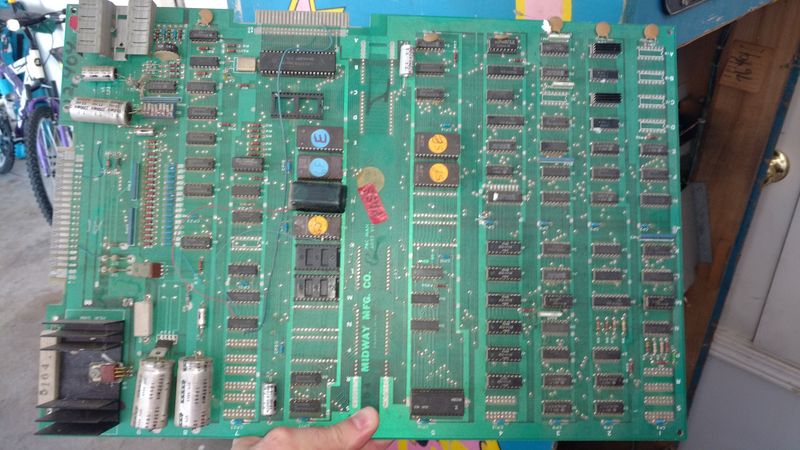
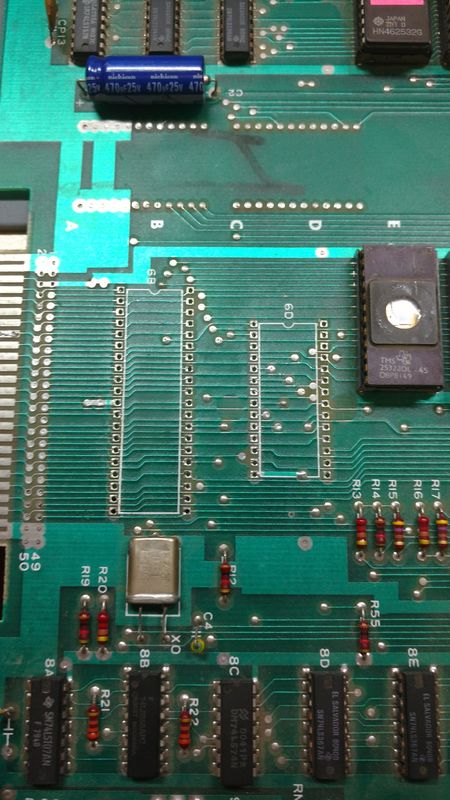
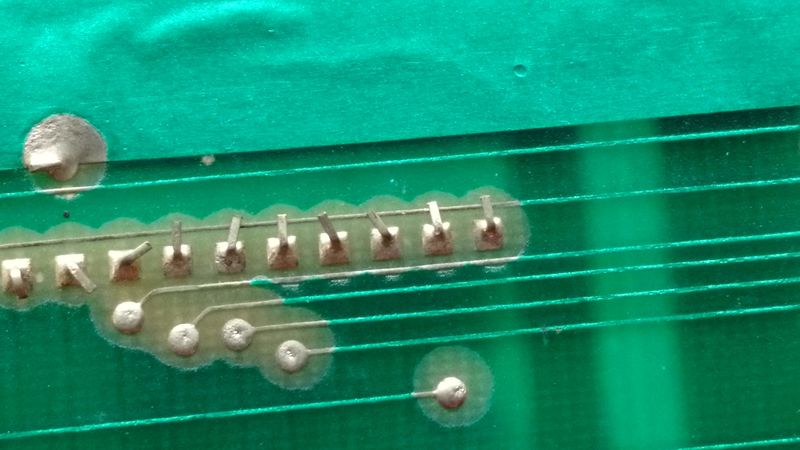
As a starting point, I removed all the hacks and repaired traces and the lifted leg on 7N -- no idea why they lifted that leg as they had already cut the trace coming from it. With a Ms Pac daughterboard and fresh set of ROMs, the board showed life, but the monitor wouldn't sync. There I left it for a few days.

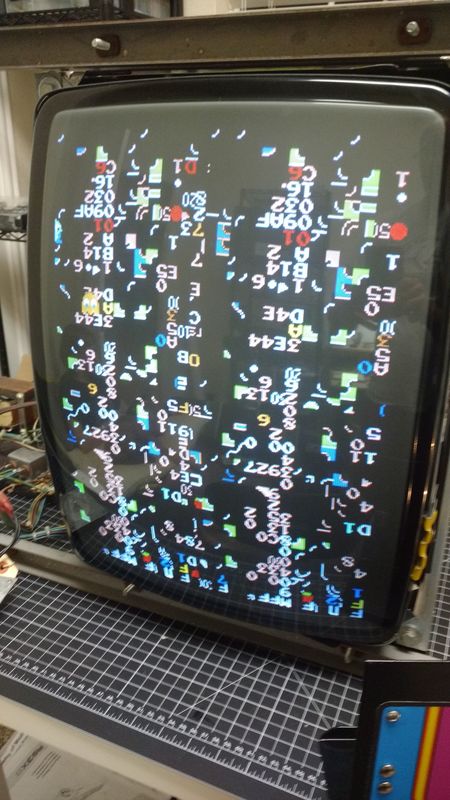
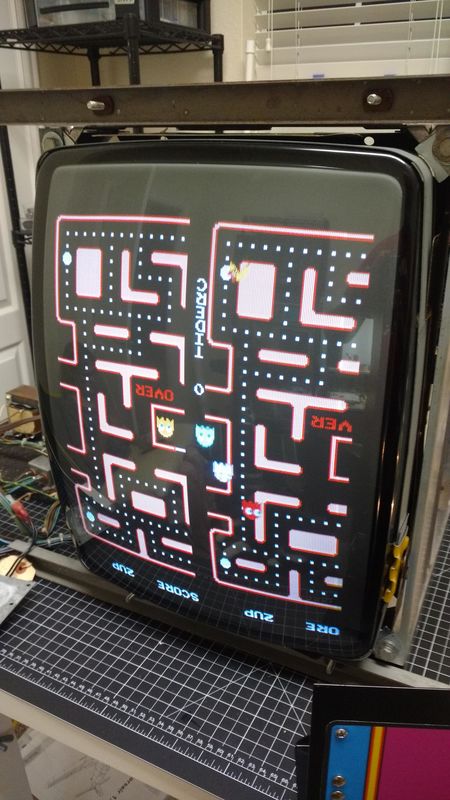
When I came back I started probing signals but before getting very far in, I had to go do something else. When I came back and powered the board back up, it came to life and displayed the usual "no boot" screen of garbage, but the picture was solid. This should have been the first clue this was going to be a problem board.

After further probing, I found 13 of 7N floating, meaning none of the ROMS were ever getting a chip enable signal. This is where I figure out that not only had they lifted pin 13, but the trace was also cut. Repaired that cut and the board would start to boot, then show "failed" and reset. Some Googling implied this might be a bad 2114. Swapping the known good memory set from the other board resulted in a good boot. Working through all the pulled chips, I found one bad 2114.

I only have one Ms Pac daughter board at the moment, so I figured I'm burn a set of PacMan ROMs and install on this board so that it was functional and I wouldn't have to keep swapping the daughterboard back and forth.

Installed the PacMan ROM set and... a screen full of "no boot" garbage. Clue #2 this is a problem child. I figured I'd double check the ROM images in case one of the 2532s was bad, or I had someone mis-programmed image. All the ROMs checked out fine. Worse, when I plugged them back in, I no longer even got the screen of garbage. I got... nothing.

Kids: double check where pin 1 is.

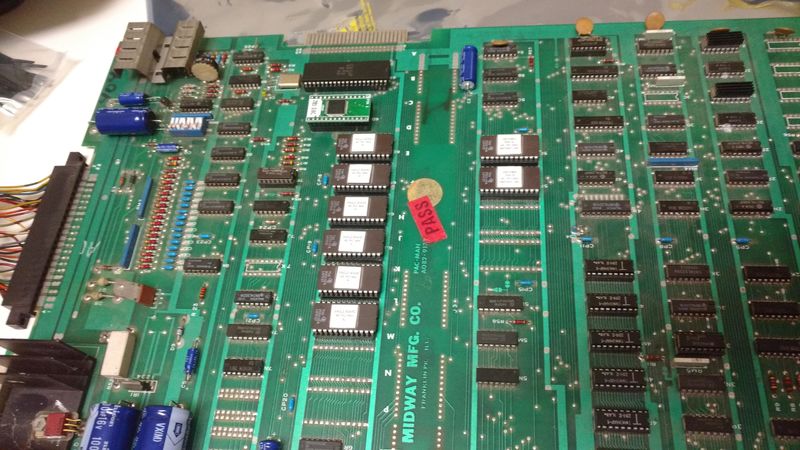
So, in plugging the ROMs back in, I managed to plug 6E and 6F in backwards. Surprisingly, one of the two survived the ordeal. Beyond feeling dumb, I was rather pissed about toasting a 2532 EPROM. I was even more annoyed when I plugged the replacement ROM in (correctly this time), and found the board wouldn't sync with the monitor again.

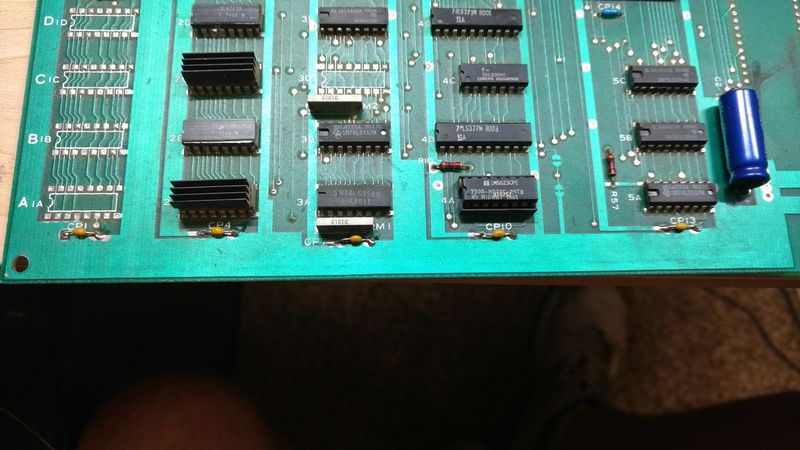
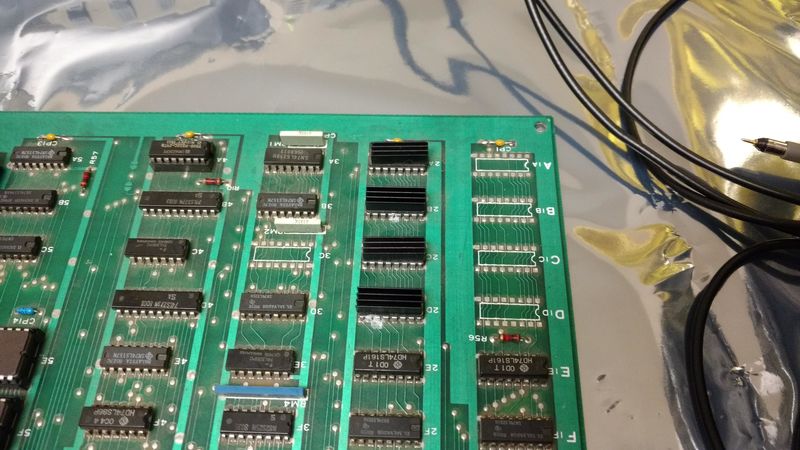
I eventually traced the no sync to a bad 74LS161 at 2S. I didn't make a note at the time about what the failure scenario was. I don't knwo whether the backwards ROMs triggered the death, or if this chip was just slowly failing and was the cause of the initial lack of sync when I started troubleshooting this board or not. Regardless, replacing it resulted in a stable picture of garbage again.

After leaving it be for a while to take a break, I came back to start probing signals again. While probing around the clocking and CPU section, the board suddenly reset and booted right up. Remember -- problem child...

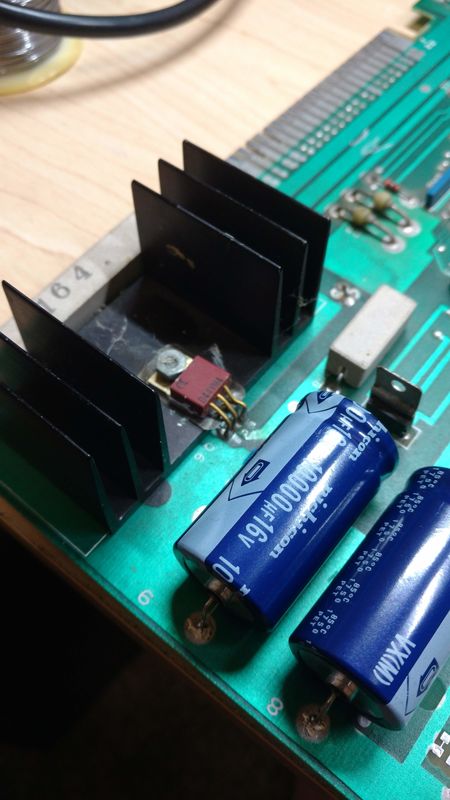
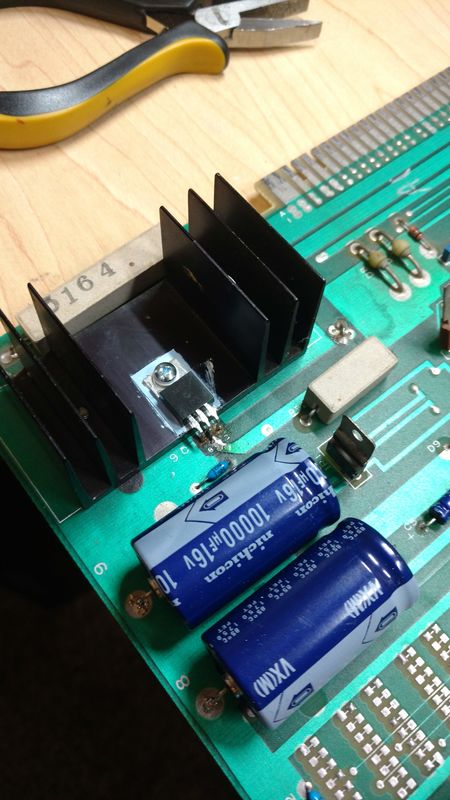
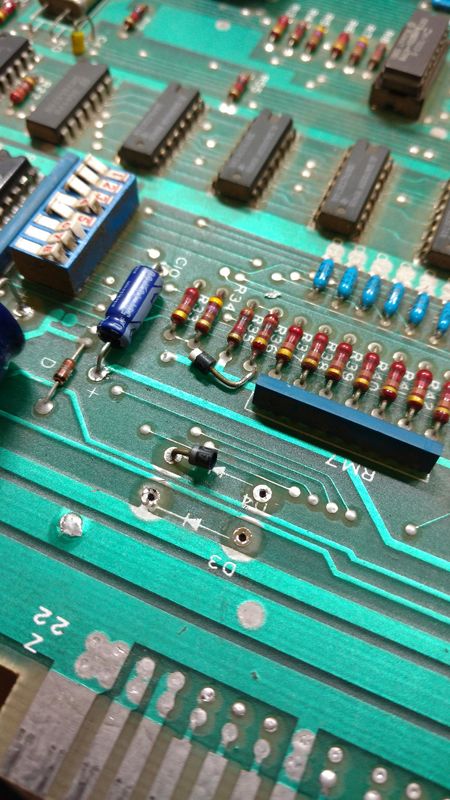
Anway, now that I had verified a working PacMan, time to start the rest of the rehab. Started by doing a cap kit. This board had not been treated well and while it seemed stable, doing the caps seemed to be a reasonable thing give how the ends of some of them looked -- not leaking, but definitely not good. I've got replacement ceramics on order too. It has at least one that is broken and the others will get replaced preemptively.

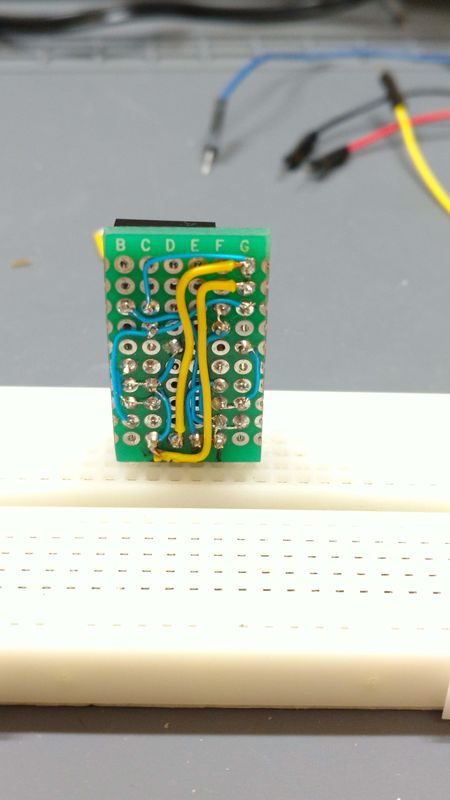
I figured I might burn a ROM set for a single board Ms Pac mod, using 6 2532s. The board already had the necessary traces cut. I wish it has been the no-serial number board that had been molested, but I figure if I could make this a good Ms Pac, I could use it in my system and make the other one available to someone down the road.

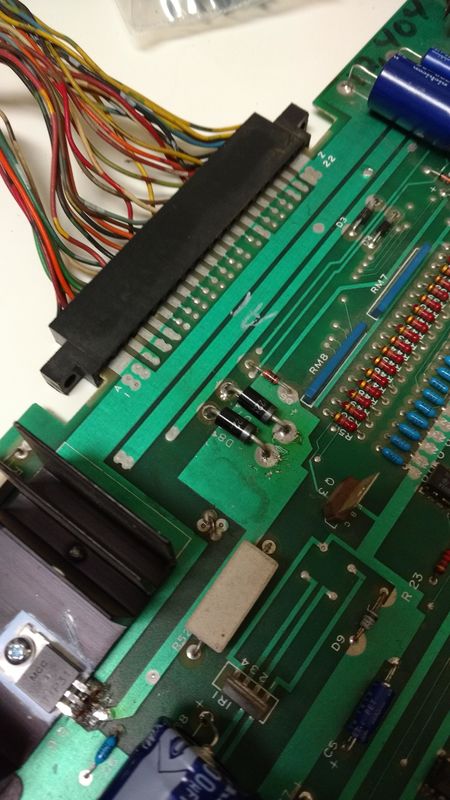
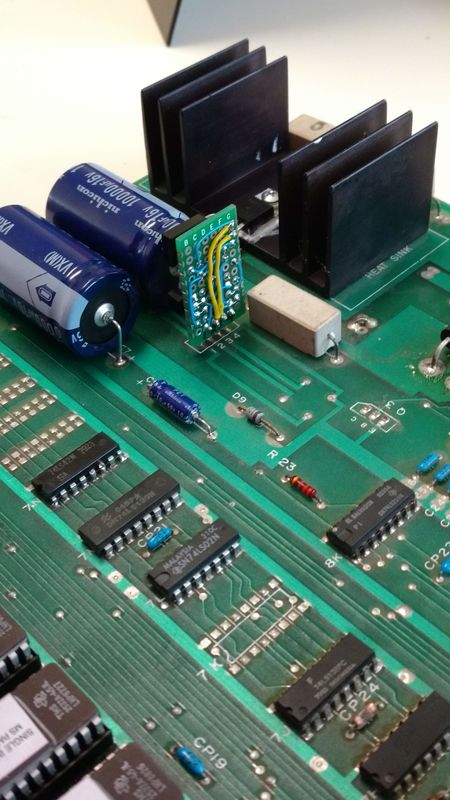
I carefully undid my repairs and put in place the appropriate mod -- a bit cleaner this time.

Image

When I powered things back up, I was met with garbage again. I double and triple checked my work and found no problems. Time with the scope found that the watchdog reset was triggering. If the reset line pulses at 3.781Hz, this is the watchdog timer overflowing...

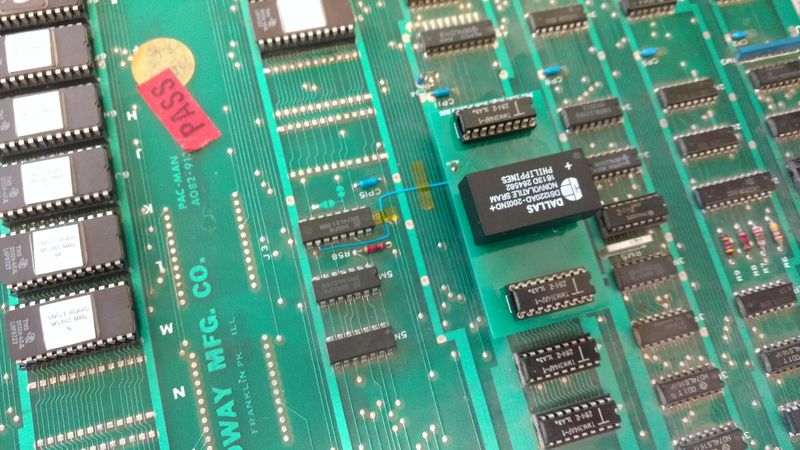
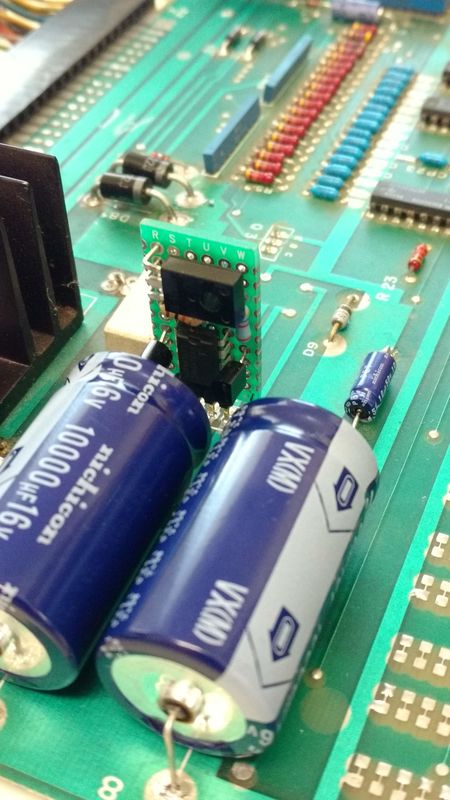
I've traced this as far as ~WDR not coming out of 7J pin 3. However it doesn't look like its 7J that has a problem. I have found that in probing around the CPU, especially if I let my finger touch a pin or three, the board will sometimes start to boot. Note that I have verified the CPU is good and I have also verified that the problem isn't the 285 custom.

Next step was to replace the CPU and 285 sockets.
 
SecretSquirrel
Minister of Gerbil Affairs
Topic Author
Posts: 2726
Joined: Tue Jan 01, 2002 7:00 pm
Location: North DFW suburb...
Contact:

Re: Stumbled on a new project this weekend.

Sun Sep 15, 2019 5:04 pm

The next time I had time to spend with this board this weekend. This was my starting point.

Image

I changed out the CPU and 285 socket.

Image

No change in the display, though now I have a much more positive "snap" when In installed the chips. So, back to tracing signals. Having gone through this a couple of times, it didn't take long to identify that the chip select lines on some of the EPROMs weren't going active. A bit more checking revealed that I should have checked my mod work four times. Apparently triple checking wasn't sufficient. A quick mod to the mod and I had a working Ms Pac, without daughter card.

In the days between these two posts, I had ordered a set of polymide (Kapton) ta[e roles in various widths. Up to this point, I've generally had access to it at work. I cleaned up the bottom side wiring and replaced the extra sockets already on the board with proper dual wipe sockets.

Image

Image
 
Captain Ned
Global Moderator
Posts: 28704
Joined: Wed Jan 16, 2002 7:00 pm
Location: Vermont, USA

Re: Stumbled on a new project this weekend.

Sun Sep 15, 2019 5:05 pm

I love the smell of 63/37 in the morning. It's the smell of ..... accomplishment (and dain bramage).
What we have today is way too much pluribus and not enough unum.
 
SecretSquirrel
Minister of Gerbil Affairs
Topic Author
Posts: 2726
Joined: Tue Jan 01, 2002 7:00 pm
Location: North DFW suburb...
Contact:

Re: Stumbled on a new project this weekend.

Sun Sep 15, 2019 5:07 pm

With the board working (mostly), it was time to fix up some of the other nagging problems. First, the ceramic disc caps. One was already completely busted, leaving just the legs. A couple of the others looked to be ready to give up the ghost. They all got changed out for nice, low profile, axial ceramic caps.

Image

After that, was the pass transistor on the regulator circuit. It had seen some physical abuse at some point in the past, plus this board reads about 4.87V on the +5V line.

Image

Image


I did have a minor annoyance in replacing the pass transistor. The component side pads, for the base and emitter, lifted off the PCB. It's really just an annoyance since they aren't actually connected to anything on the component side. There isn't really much holding them to the PCB. Still, annoying...

Other than ordering some RAM heatsinks, that pretty much does it for updating this board -- well, other that tracking down the slightly low +5V, but the board is functional so that's kinda low priority and maybe a little OCD.
 
SecretSquirrel
Minister of Gerbil Affairs
Topic Author
Posts: 2726
Joined: Tue Jan 01, 2002 7:00 pm
Location: North DFW suburb...
Contact:

Re: Stumbled on a new project this weekend.

Sun Sep 15, 2019 5:12 pm

I said in the prior post that the board was working, despite the slightly low +5V. That's kinda true. Throughout my debugging various issues, there had been intermittent graphics glitches, but they had been so quick that I couldn't really tell you what they were, other than glitches. During the tail end of the above repairs, the board finally glitched permanently.

Image

Ms Pac and the Ghosts are all in there proper locations. It's just the underlying maze, or text in the attract screen, that is showing the right half twice. This immediately made me think about the vertical and horizontal count signals. The 128V signal, in this case, was stuck (mostly low, but not floating). Probing it at 2F, pin 12, 2S, pin 12, and 3P pin 9, resulted in the same signal, so not a broken trace.

I started looking at where the signal went and found that from 2S ping 12, it ran by the socket for the VRAM addresser. Apparently the socket pins were quite long. Over time, they got bent over and finally made permanent contact with the 128V line.

Image

The last thing to do was to install a basic high score save kit. This one is nothing fancy. Single high score. That's it.

Image

In the end, the simplicity was helpful. Like all high score kits, it came with a replacement ROM. Just for ROM 6E, in this case. However, since I have I'm already using modified ROMs to support the no daughter card mod, this took a little creativity. I combined the two ROM patches for 6E, and at least as far as I've tested, was successful. I'd like to apply a free play attract mod as well, but the high score kit code sits in the blank space at the end of the 6E ROM where that change would got. I'll have to ponder over that a bit, but for the time being, all is good. I did get in touch with the kit seller and he provided a ROM set that should work with this board, but I haven't tried it yet.

At this point still needed to clean the board and chase down the low +5V, but it's functional and I'm happy.
 
SecretSquirrel
Minister of Gerbil Affairs
Topic Author
Posts: 2726
Joined: Tue Jan 01, 2002 7:00 pm
Location: North DFW suburb...
Contact:

Re: Stumbled on a new project this weekend.

Sun Sep 15, 2019 5:16 pm

I continue dto fix up this board as I had time.

If you look closely at some of the earlier pictures, you can see that D3/D4, the +16V rectifier diodes are mismatched. I replaced them with new 1N4004s. I'm glad I decided to as the one in the plastic case self destructed while desoldering.

Image

I also replaced D7 and D8 with new 400V/5A recitifiers. Even with an 80W iron, they are a PIA. I left them slightly higher off the board that the original diodes to give a little more heat clearance.

Image

The +5V line is still at about 4.88V, coming out of the regulator. Technically, this is in spec for the 78GUIC. It is rated at +/- 4%, or 0.2V. So 4.8-5.2V is in spec. I'm considering replacing it, though with an equivalent circuit, not another 78GUIC. The regulation on the replacement would be 0.2%, or about 0.01V. Need to test the circuit design on the bench though. Sometimes simulation and reality don't see eye to eye.

Also replaced the missing heat sinks on 2B and 2D.

Image
 
SecretSquirrel
Minister of Gerbil Affairs
Topic Author
Posts: 2726
Joined: Tue Jan 01, 2002 7:00 pm
Location: North DFW suburb...
Contact:

Re: Stumbled on a new project this weekend.

Sun Sep 15, 2019 5:19 pm

Last weekend I put together the replacement for the voltage regulator for this board.

Image

Image

Image

Image

The eagle eyed will notice a difference in the pictures of the board between the bread board and the Pac PCB. The pinout on the 78GUIC datasheet I was using was different that the pinout of the 78GUIC on the Pac board. Needless to say, it didn't work the first time I installed it. Corrected the module pinout to match the board and all is good. Voltage read as 4.968V after install, 4.88V before. It's a minor difference, but this was kind of the test board. With a little bit of work, I could do a surface mount layout that would fit in a TO-220 sized space, however I don't think it would be much cheaper than the NTE953 replacement for the 78GUIC, though it would be more accurate.

Unfortunately, one of the times I picked up th board, Q3 decided it didn't want to come along. It's legs must have been very weak. New one ordered and sitting on my desk.

That brings this thread up to date with all the goings on of the summer.

--SS
 
Captain Ned
Global Moderator
Posts: 28704
Joined: Wed Jan 16, 2002 7:00 pm
Location: Vermont, USA

Re: Stumbled on a new project this weekend.

Sun Sep 15, 2019 5:22 pm

So, when are you going to take on a Star Wars vector unit (The only cabinet I would buy if I could find a working one at an affordable price. The monitor is unobtanium.)?
What we have today is way too much pluribus and not enough unum.
 
just brew it!
Administrator
Posts: 54500
Joined: Tue Aug 20, 2002 10:51 pm
Location: Somewhere, having a beer

Re: Stumbled on a new project this weekend.

Sun Sep 15, 2019 5:37 pm

Lucky you didn't fry the regulator (or worse...) with the initial mis-wiring!

Any idea how much current that regulator is being asked to supply? You might be able to replace it with a simple 3-terminal regulator (7805 family or similar). Not sure why they used a 4-terminal adjustable regulator in the original design.
Nostalgia isn't what it used to be.
 
SecretSquirrel
Minister of Gerbil Affairs
Topic Author
Posts: 2726
Joined: Tue Jan 01, 2002 7:00 pm
Location: North DFW suburb...
Contact:

Re: Stumbled on a new project this weekend.

Sun Sep 15, 2019 8:31 pm

just brew it! wrote:
Lucky you didn't fry the regulator (or worse...) with the initial mis-wiring!

Any idea how much current that regulator is being asked to supply? You might be able to replace it with a simple 3-terminal regulator (7805 family or similar). Not sure why they used a 4-terminal adjustable regulator in the original design.


The regulator has a 50ohm series resistor on the input that will limit the current to around 160mA max. It also helps limit the power dissipated in the regulator. The only current the regulator is providing is the base drive for the pass transistor which has enough gain that 150-160ma is quite sufficient.

I don't know right off hand what the 5V draw is, but the 7VAC line is fused at 5A, so it's not terribly high, but it's definitely higher than a 1.5A 7805 could provide. Adding a pass transistor to a 7805 pushes the drop out voltage up to the 8V range, which is above the 7.5VDC derived from the raw 7VAC feed. They could have used the 16VDC to generate it, but the regulation loss would have been really high (>30W). An LM317 would also need a higher input voltage than the 7.5VDC could maintain.

The four terminal adjustable they used allowed an external feedback loop. Because it has a separate ground pin, there is much more flexibility in how the adjustment voltage is generated.

--SS
 
just brew it!
Administrator
Posts: 54500
Joined: Tue Aug 20, 2002 10:51 pm
Location: Somewhere, having a beer

Re: Stumbled on a new project this weekend.

Sun Sep 15, 2019 9:13 pm

Ahh, makes sense given the state of tech back then and the circuit parameters. I'd be somewhat inclined to replace it with a modern switcher (not sure how much you care about sticking close to the original circuit design).
Nostalgia isn't what it used to be.
 
drfish
Gerbil Elder
Posts: 5546
Joined: Wed Jan 22, 2003 7:53 pm
Location: Zeeland, MI

Re: Stumbled on a new project this weekend.

Mon Sep 16, 2019 6:52 am

I have nothing constructive to contribute, just wanted to say again that I really enjoy updates to this thread. Thanks for sharing! :)
 
SecretSquirrel
Minister of Gerbil Affairs
Topic Author
Posts: 2726
Joined: Tue Jan 01, 2002 7:00 pm
Location: North DFW suburb...
Contact:

Re: Stumbled on a new project this weekend.

Mon Sep 16, 2019 7:02 am

Captain Ned wrote:
So, when are you going to take on a Star Wars vector unit (The only cabinet I would buy if I could find a working one at an affordable price. The monitor is unobtanium.)?


My wife has been asking what I'm going to do with my time when Ms Pacman is done. Not entirely sure she really wants to know the answer. :lol: I might be more tempted to get an Asteroids, though a Star Wars would be awfully cool. In reality, I don't have a whole lot more space unless I want to turn the upstairs family room into a full blown arcade. Not entirely sure how that would go over...

--SS
 
SecretSquirrel
Minister of Gerbil Affairs
Topic Author
Posts: 2726
Joined: Tue Jan 01, 2002 7:00 pm
Location: North DFW suburb...
Contact:

Re: Stumbled on a new project this weekend.

Mon Sep 16, 2019 7:04 am

just brew it! wrote:
Ahh, makes sense given the state of tech back then and the circuit parameters. I'd be somewhat inclined to replace it with a modern switcher (not sure how much you care about sticking close to the original circuit design).


There are a number of switcher conversion options. Most either remove, or bypass the existing linear power supply section and use a external dual output switching supply.

--SS
 
The Egg
Minister of Gerbil Affairs
Posts: 2938
Joined: Sun Apr 06, 2008 4:46 pm

Re: Stumbled on a new project this weekend.

Mon Sep 16, 2019 9:23 am

This has been one of my favorite threads on TR.
 
Thagarr
Gerbil
Posts: 10
Joined: Wed May 16, 2012 1:58 pm
Location: IL

Re: Stumbled on a new project this weekend.

Mon Sep 16, 2019 9:41 am

Great job rescuing that second PCB!

This thread is one of two things keeping me coming back to the TR forums. While I haven't exactly been an active member, I have been reading TR and these forums for almost 2 decades, old habits die hard.
 
SecretSquirrel
Minister of Gerbil Affairs
Topic Author
Posts: 2726
Joined: Tue Jan 01, 2002 7:00 pm
Location: North DFW suburb...
Contact:

Re: Stumbled on a new project this weekend.

Mon Sep 16, 2019 8:13 pm

Thagarr wrote:
Great job rescuing that second PCB!

This thread is one of two things keeping me coming back to the TR forums. While I haven't exactly been an active member, I have been reading TR and these forums for almost 2 decades, old habits die hard.


I actually have a busted Ms Pac bootleg on the way. Someone on KLOV was replacing it with a stock board and let it go cheap. Couldn't resist. :D

Started sanding this evening. Started with the right side that I had painted on Saturday. Turned out somewhat odd. The debris wasn't what I was expecting.

Image

Not sure if it's just how the Kilz primer sands, or if the paint isn't dry -- though I've sanded un-dry paint before and that failure was a lot different. This sanded down smooth. All in all, I'm reasonably happy with how this first pass turned out.

--SS
  • 1
  • 4
  • 5
  • 6
  • 7
  • 8
  • 9

Who is online

Users browsing this forum: No registered users and 1 guest
GZIP: On