Personal computing discussed

Moderators: askfranklin, renee, emkubed, Captain Ned

  • 1
  • 2
  • 3
  • 4
  • 5
  • 6
  • 9
 
SecretSquirrel
Minister of Gerbil Affairs
Topic Author
Posts: 2726
Joined: Tue Jan 01, 2002 7:00 pm
Location: North DFW suburb...
Contact:

Re: Stumbled on a new project this weekend.

Thu Apr 11, 2019 9:15 am

thegleek wrote:
SecretSquirrel wrote:
Find me a 9A2795-003 width coil. None on that site. While 9A2838-003 is likely a compatible coil, electrically, it is not physically.

I checked the original wire. Its 10/35 Litz. Ordered a spool of 16/36 as it is available and of similar cross section -- equivalent to 24AWG. --SS


Ok so I guess I've been lucky with my K4600 chassis so far... I didn't realize those coils were impossible to find. Others have mentioned they use the K7000 coils (9a2838-001a) in their K4600 with no issues:

https://www.arcadepartsandrepair.com/st ... idth-coil/


Yeah, the electrical specs are similar enough. But, for about $3 worth of parts, and some time, I'm going to wind one that actually fits the chassis properly. Going to put my 3d printer to use and print the mounting hardware. :D
 
thegleek
Darth Gerbil
Posts: 7460
Joined: Tue Jun 10, 2003 11:06 am
Location: Detroit, MI
Contact:

Re: Stumbled on a new project this weekend.

Thu Apr 11, 2019 9:21 am

SecretSquirrel wrote:
Yeah, the electrical specs are similar enough. But, for about $3 worth of parts, and some time, I'm going to wind one that actually fits the chassis properly. Going to put my 3d printer to use and print the mounting hardware. :D


you minds well go into business and start reproducing these! i'll buy 1-2 off ya! :)
––•–√\/––√\/––•–– nostalgia is an emotion for people with no future ––•–√\/––√\/––•–-
 
SecretSquirrel
Minister of Gerbil Affairs
Topic Author
Posts: 2726
Joined: Tue Jan 01, 2002 7:00 pm
Location: North DFW suburb...
Contact:

Re: Stumbled on a new project this weekend.

Thu Apr 11, 2019 4:45 pm

thegleek wrote:
SecretSquirrel wrote:
Yeah, the electrical specs are similar enough. But, for about $3 worth of parts, and some time, I'm going to wind one that actually fits the chassis properly. Going to put my 3d printer to use and print the mounting hardware. :D


you minds well go into business and start reproducing these! i'll buy 1-2 off ya! :)


I had that thought actually. We'll see how it goes. I'll have enough wire and slugs to make 8 more. I'd need to order some more coil forms, but that's not hard.

I suppose there are worse ways to offset the cost of "hobbies". :D
 
SecretSquirrel
Minister of Gerbil Affairs
Topic Author
Posts: 2726
Joined: Tue Jan 01, 2002 7:00 pm
Location: North DFW suburb...
Contact:

Re: Stumbled on a new project this weekend.

Sat Apr 13, 2019 8:46 pm

I've positive progress and pictures that I need to post., I got the metal bits back from powder coating. But things might get put on hold for a couple of days: I have the best wife ever!

:D

--SS
 
SecretSquirrel
Minister of Gerbil Affairs
Topic Author
Posts: 2726
Joined: Tue Jan 01, 2002 7:00 pm
Location: North DFW suburb...
Contact:

Re: Stumbled on a new project this weekend.

Sun Apr 14, 2019 9:09 pm

Yesterday, I made a trip to my favorite toy store: Tanner's electronics. Think cross between a surplus shop and a real electronics parts store. You need discrete parts of any sort and they probably have it. Esoteric ICs? Yep, that too. Prices are good and the people helpful. Picked up some inductors and power resistors to make a temporary replacement for the width coil.

Image

I didn't shorten the leads or make it look any nicer as it's quite temporary, and I want to be able to use the parts for other stuff in the future if needed. The inductors are a pair of 500uH power inductors. Paralleled, the inductance is just about perfect, but the resistance is way low. So, in series, add a paralleled pair of 0.75ohm power resistors. In the end, I got 220uH and just a hair under 0.4ohms. Works like a champ.

Image

Today, however, was the real jackpot. Bought a vintage Zenith Space Command 19" Color TV. Paid a good bit for it, but it is worth every penny. It has a tube/yoke pair that is an exact replacement for my K4626. No dealing with purity rings and convergence strip due to a yoke swap. Picked up the pinball machine after that....

The cardboard coil formers and Litz wire arrived yesterday. Tuning slugs should arrive on Tuesday. Need to spend some time doing CAD work for a coil winding form and mounting hardware. Picked up a belt sander and random orbit finishing sander, as well as the requisite belts and pads yesterday. Getting the metal back from powder coating definitely encouraged me to get started on the cabinet.

Busy weekend all around. Unfortunately I have to travel for business the week after Easter, so things might slow a bit. Actually, I might take all the measurements I need and do CAD work while traveling.

--SS
 
drfish
Gerbil Elder
Posts: 5546
Joined: Wed Jan 22, 2003 7:53 pm
Location: Zeeland, MI

Re: Stumbled on a new project this weekend.

Mon Apr 15, 2019 6:47 am

Pretty! :o
 
just brew it!
Administrator
Posts: 54500
Joined: Tue Aug 20, 2002 10:51 pm
Location: Somewhere, having a beer

Re: Stumbled on a new project this weekend.

Mon Apr 15, 2019 7:50 am

If the TV has the same tube maybe it also has a coil similar to the one you're trying to rebuild?
Nostalgia isn't what it used to be.
 
SecretSquirrel
Minister of Gerbil Affairs
Topic Author
Posts: 2726
Joined: Tue Jan 01, 2002 7:00 pm
Location: North DFW suburb...
Contact:

Re: Stumbled on a new project this weekend.

Mon Apr 15, 2019 8:34 am

just brew it! wrote:
If the TV has the same tube maybe it also has a coil similar to the one you're trying to rebuild?


That was what I meant by the tube/yoke combo being an exact match. The yoke (coil) resistance and inductance match within 10%.

--SS
 
Bomber
Gerbil XP
Posts: 446
Joined: Sat Jan 19, 2002 7:00 pm
Location: Aurora, CO

Re: Stumbled on a new project this weekend.

Mon Apr 15, 2019 11:53 am

This is hands down one of the coolest threads that has passed through here in ages. Tip of the hat to you SS, the work here is amazing. Definitely preserving a piece of history
 
just brew it!
Administrator
Posts: 54500
Joined: Tue Aug 20, 2002 10:51 pm
Location: Somewhere, having a beer

Re: Stumbled on a new project this weekend.

Mon Apr 15, 2019 12:59 pm

SecretSquirrel wrote:
just brew it! wrote:
If the TV has the same tube maybe it also has a coil similar to the one you're trying to rebuild?

That was what I meant by the tube/yoke combo being an exact match. The yoke (coil) resistance and inductance match within 10%.

I meant the inductor you're trying to rewind. Might be worth checking the driver board of the TV to see what's on there.
Nostalgia isn't what it used to be.
 
derFunkenstein
Gerbil God
Posts: 25427
Joined: Fri Feb 21, 2003 9:13 pm
Location: Comin' to you directly from the Mothership

Re: Stumbled on a new project this weekend.

Mon Apr 15, 2019 2:09 pm

Oh wow. That's going to look just as good on the screen as it did in 1981. The test pattern on the CRT has no signs of burn that I can see. Probably better geometry, too. :lol:
I do not understand what I do. For what I want to do I do not do, but what I hate I do.
Twittering away the day at @TVsBen
 
SecretSquirrel
Minister of Gerbil Affairs
Topic Author
Posts: 2726
Joined: Tue Jan 01, 2002 7:00 pm
Location: North DFW suburb...
Contact:

Re: Stumbled on a new project this weekend.

Mon Apr 15, 2019 3:45 pm

derFunkenstein wrote:
Oh wow. That's going to look just as good on the screen as it did in 1981. The test pattern on the CRT has no signs of burn that I can see. Probably better geometry, too. :lol:


The current screen has definite burn that is visible when off. You can just make it out in the test pattern picture. It isn't horrible and I won't be junking the tube, thats for sure. Might not be good for anything other than a Pac Man / Ms Pac Man though. Not sure you want to see maze burns on your Galaga/Galaxian/Gyrus/etc.

I need to clean out the donor TV as it was pretty dusty inside. However, it was nice clean dust, not dirty greasy arcade dust, so the air compressor should be enough and I can wipe down the tube once its out.

As far as the width coil goes, all the newer TV's control the width electronically and all the older ones I have looked at have vertical coils that mount on the PCB, rather than the "remote" coil on the K46xx. I will, however, certainly be keeping the TV guts as there are plenty of other useful scrap parts.

--SS
 
thegleek
Darth Gerbil
Posts: 7460
Joined: Tue Jun 10, 2003 11:06 am
Location: Detroit, MI
Contact:

Re: Stumbled on a new project this weekend.

Mon Apr 15, 2019 11:50 pm

Bomber wrote:
This is hands down one of the coolest threads that has passed through here in ages. Tip of the hat to you SS, the work here is amazing. Definitely preserving a piece of history


SS does a great job of presenting his hobby here with only 1 game. Imagine having a collection of 28 of these games. That's what I have. I just don't bother to make threads and posts about it anymore... :)
––•–√\/––√\/––•–– nostalgia is an emotion for people with no future ––•–√\/––√\/––•–-
 
thegleek
Darth Gerbil
Posts: 7460
Joined: Tue Jun 10, 2003 11:06 am
Location: Detroit, MI
Contact:

Re: Stumbled on a new project this weekend.

Mon Apr 15, 2019 11:51 pm

thegleek wrote:
Bomber wrote:
This is hands down one of the coolest threads that has passed through here in ages. Tip of the hat to you SS, the work here is amazing. Definitely preserving a piece of history


SS does a great job of presenting his hobby here with only 1 game. Imagine having a collection of 28 of these games. That's what I have. I just don't bother to make threads and posts about it anymore (well excluding KLOV)... :)
––•–√\/––√\/––•–– nostalgia is an emotion for people with no future ––•–√\/––√\/––•–-
 
Bomber
Gerbil XP
Posts: 446
Joined: Sat Jan 19, 2002 7:00 pm
Location: Aurora, CO

Re: Stumbled on a new project this weekend.

Tue Apr 16, 2019 9:13 am

thegleek wrote:
Bomber wrote:
This is hands down one of the coolest threads that has passed through here in ages. Tip of the hat to you SS, the work here is amazing. Definitely preserving a piece of history


SS does a great job of presenting his hobby here with only 1 game. Imagine having a collection of 28 of these games. That's what I have. I just don't bother to make threads and posts about it anymore... :)


LOL That's awesome too ;) I don't have near the patience to do it no matter how much I'd like to do something like this.
 
toki
Gerbil XP
Posts: 353
Joined: Fri Nov 08, 2013 3:55 pm

Re: Stumbled on a new project this weekend.

Tue Apr 16, 2019 2:01 pm

This thread made me go searching for this thing. I used to own this in 198--- something. It was awesome!

https://youtu.be/7CaFRE96aeQ
 
MOSFET
Gerbil XP
Posts: 373
Joined: Fri Aug 08, 2014 12:42 am

Re: Stumbled on a new project this weekend.

Tue Apr 16, 2019 8:11 pm

Bomber wrote:
This is hands down one of the coolest threads that has passed through here in ages. Tip of the hat to you SS, the work here is amazing. Definitely preserving a piece of history


Absolutely, this is a fascinating thread! If you don't write about it, it's hard for us to know you've done something cool, or in this case, totally awesome, maybe even rad.
Be careful on inserting this (or any G34 chip) into the socket. Once you pull that restraining lever, it is either a good install or a piece of silicon jewelry.
 
SecretSquirrel
Minister of Gerbil Affairs
Topic Author
Posts: 2726
Joined: Tue Jan 01, 2002 7:00 pm
Location: North DFW suburb...
Contact:

Re: Stumbled on a new project this weekend.

Tue Apr 16, 2019 9:06 pm

Since I work for a California company, lots of days my schedule is skewed by a couple hours. Today is one of those days. So I take some time in the morning for projects. It's both good and bad. It's bad in that I have a hard stop when I need to go to work, so if I get going good on something, I can't continue. It's good because I have a tendency to get going on something, then look up and find that it is 1AM. :o

All that to say, I spent some time harvesting donor organs this morning.

The donor:
Image

Image

As I noted earlier, it was a bit dusty inside. Nothing like the Ms Pac when I opened it, but still nasty enough it needed to be cleaned out.
Image

Took it out in the driveway and took the air hose to it. Still a bit gray, but at least stuff won't go everywhere if I sneeze.
Image

Got it back up in the work shop and removed the tube from the rest of the TV.
Image

It was still dirty enough that I decided to take it out and give it a bath. 30 minutes, or so, later... A nice clean tube sitting on the workbench to finish drying.
Image

Between working later today, and other stuff after work, I'm not going to get any more time to work on it today. However, the 3D printer is busy printing a winding form for the replacement horizontal coil I'll post pictures once it is done. Anyone who has ever tried to wind a coil of any sort knows how tedious it can be, and having a form to help guide you is a huge plus. It is designed so that the cardboard tube that holds the coil will slide over a center shaft and sit in the bottom, while the top screws on, with the tube extending into the top as well. The top and bottom should be exactly 23mm apart. It should allow me to get a nice tight and even wind, without worrying about the cardboard tube collapsing or breaking and without worrying about the edges of the coil going wonky. Keeping my fingers crossed. :lol:

--SS
 
SecretSquirrel
Minister of Gerbil Affairs
Topic Author
Posts: 2726
Joined: Tue Jan 01, 2002 7:00 pm
Location: North DFW suburb...
Contact:

Re: Stumbled on a new project this weekend.

Wed Apr 17, 2019 1:52 pm

This morning's efforts....

Pulled the old tube out of the frame. Moving huge, heavy hunks of glass is scary...
Image

And then installed the new tube.
Image

While the tube fits perfectly, the yoke windings are terminated on the "wrong side". In the end, the connections for the coils will fit with enough clearance. The yoke frame is all one piece and rotating the yoke 180deg would rotate the purity rings too. Trying to avoid that mess so it will stay as is.
Image

Got it all connected up and turned it on and ... nothing... :-? Turns out, things work a lot better if you plug the neck board into the tube. :oops:
Second try...
Image

It's a bit fuzzy and too big, but it's Ms Pac Man. The colors look good, and there's no smoke, arcing, or other signs problems.

The test pattern screen shows just how fuzzy the focus is.
Image

After a bit of adjusting, things look much better.
Image

Image

The width adjustment is off obviously. That will take a bit more tweaking to adjust and I didn't have any more time this morning to work on it. There is also the droop on the right hand side, to taken care of.

--SS
 
SecretSquirrel
Minister of Gerbil Affairs
Topic Author
Posts: 2726
Joined: Tue Jan 01, 2002 7:00 pm
Location: North DFW suburb...
Contact:

Re: Stumbled on a new project this weekend.

Thu Apr 18, 2019 11:08 am

Took a few iterations to get the tolerances right, mainly on the threaded shaft and the matching threads inside the end of the form.

Image

The coil former slides over the shaft and into the base.
Image

Then the top of the form slides over the tube and screws down. The end result firmly holds the cardboard tube in place and gives a 23mm gap for winding the coil.
Image

Then it was coil winding time. There are four layers. I might rethink the form design if I was going to wind more of these. After each layer, I coated the layer with nail polish to help set the wire in place. But, I couldn't go right up to the edge as I didn't want to glue the winding form to the coil. So when the form was removed, there was still a bit of collapse of the ends of the coil. Might have helped if I was a bit more patient and let the nail polish fully set too. :oops: The final layer got several coats to really freeze thing in place. Once the form was removed, the ends were also coated. In the end, I'm happy with it.
Image

Next up is to design and print the ring to hold the terminals and get that installed. Once that is done, I can test my efforts and see how close reality comes to simulations and calculations.

--SS
 
drfish
Gerbil Elder
Posts: 5546
Joined: Wed Jan 22, 2003 7:53 pm
Location: Zeeland, MI

Re: Stumbled on a new project this weekend.

Thu Apr 18, 2019 12:23 pm

Freaking sweet. 8) I love the combination of old-school and new-school.
 
SecretSquirrel
Minister of Gerbil Affairs
Topic Author
Posts: 2726
Joined: Tue Jan 01, 2002 7:00 pm
Location: North DFW suburb...
Contact:

Re: Stumbled on a new project this weekend.

Tue Apr 23, 2019 3:03 pm

I'm out of town on business travel this week, so progress is on hold, but I can provide some updates from late last week. First....

Image

Image

So, it turns out that I made a bad assumption about the width coil I was assuming that since the inductance of the yoke increased slightly, the width coil would need to decrease by a similar amount to keep the total inductance the same. Turns out that's not the case, and the relationship is much more complex. The width coil is actually being used as something like a negative resistor. It is actually compensating for the DC resistance in the deflection coil. Because it has a magnetic core that can saturate, at high currents, when the core is saturated, the effective impedance becomes zero (or very low) so the voltage drop across it is low. At this same time, the current through the deflection coil generates the highest voltage drop. As the current drops and the width coil core is caries less and less magnetic energy, the impedance rises, causing a higher voltage drop. The counter acts the reduction in voltage drop across the deflection coil.

All this acts together with the width capacitor to form a tuned RLC filter. The whole thing is quite complex and hard to simulate due to the magnetic core in the width coil. I learned all this after putting my first attempt a coil winding in place and finding that the width went the wrong direction. The small value of my replacement coil made the picture wider. I think put in place a 500uH fixed coil and got the above images. Quite happy! :D

The right hand drop is actually due to vertical sync mis-adjustment. I didn't take any pictures, but an adjustment of the vertical sync POT removed the drop and left me with a nice clean image.

--SS
 
SecretSquirrel
Minister of Gerbil Affairs
Topic Author
Posts: 2726
Joined: Tue Jan 01, 2002 7:00 pm
Location: North DFW suburb...
Contact:

Re: Stumbled on a new project this weekend.

Tue Apr 23, 2019 6:19 pm

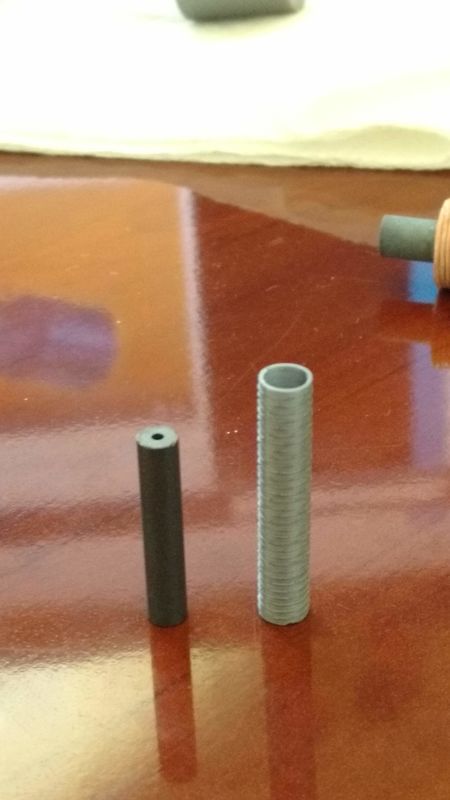
The prior experiment and realization about the coil value was quite timely. My first coil was about 25% below the stock coil, coming in at around 33uH instead of 45uH, so I was already thinking about making a second one. My original calculations were with solid core wire instead of the stranded Litz wire. Then I ran into another problem. Namely, the threaded ferrite slugs I have are too tight once threaded all the way in. Even with a lubricant, they bind in the cardboard and you will eventually crack it. That was quite annoying to discover. I ended up destroying part of the cardboard former while getting the shattered slug out. Before I broke the slug, I checked the coil value... It looked way low, only about 90uH. More on that in a moment.

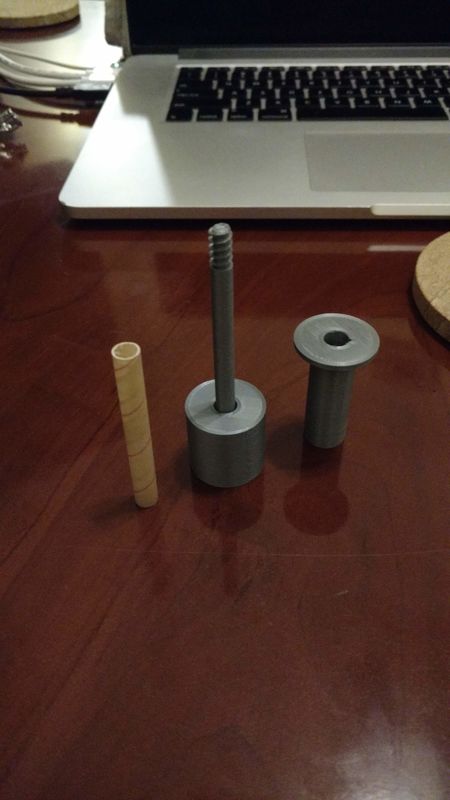
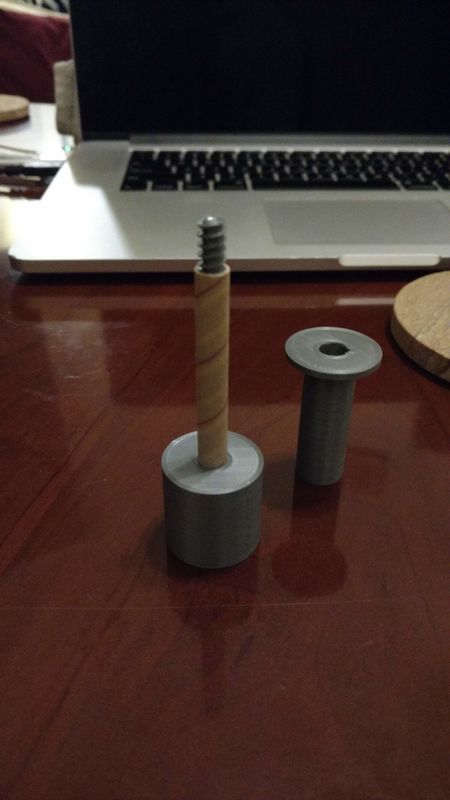
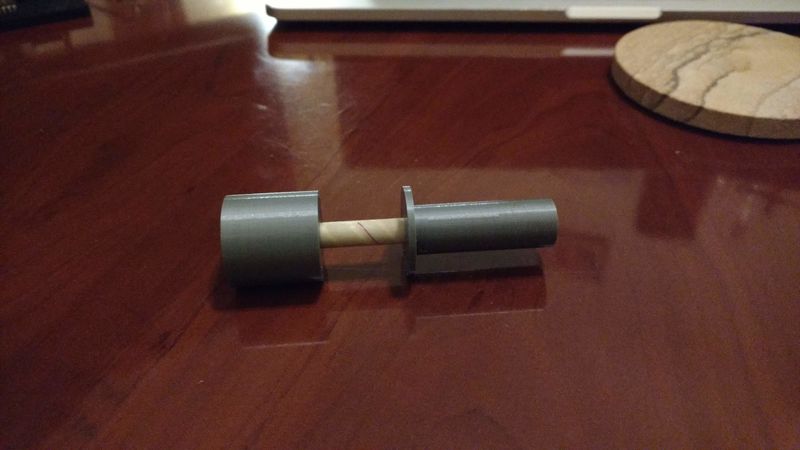
On to attempt #2. I ordered three difference coil forms is slightly different tolerances for the inner and outer diameter. I picked the one that seemed to have the smoothest fit, as opposed to the one that matched the original length, which is what I started with. I quick slice with a razor blade fixed the length issue.

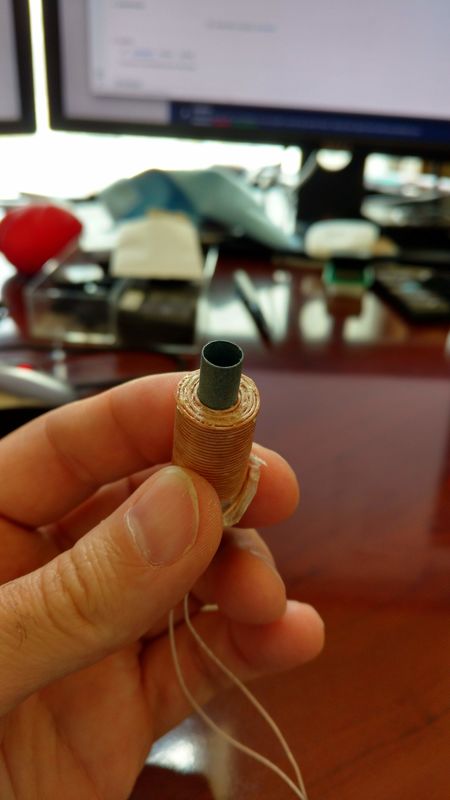
The other lesson I learned was to put some sort of separator between the winding form the the ends of the coil to allow for better coating of the layers. I used waxed paper. This is the first layer.
Image

After each layer, I coated the winding with nail polish and let it cure. This is layer #2. Because of the waxed paper separator, I could go all way to the end of the winding. I was also a bit more patient and let everything cure well prior to moving on to the next layer.
Image

From the first coil, I knew I needed more than four layers. Because each layer has more wire in it, the progression isn't linear. Something around 4.75 layers would have given me the original 45uH. However, I knew I needed a higher max inductance since I needed something around 500uH. The stock coil had about a 7x range of inductance, from 45uH to over 250uH. I targeted my second attempt for about 98uH with no core. This worked out to six full layers.

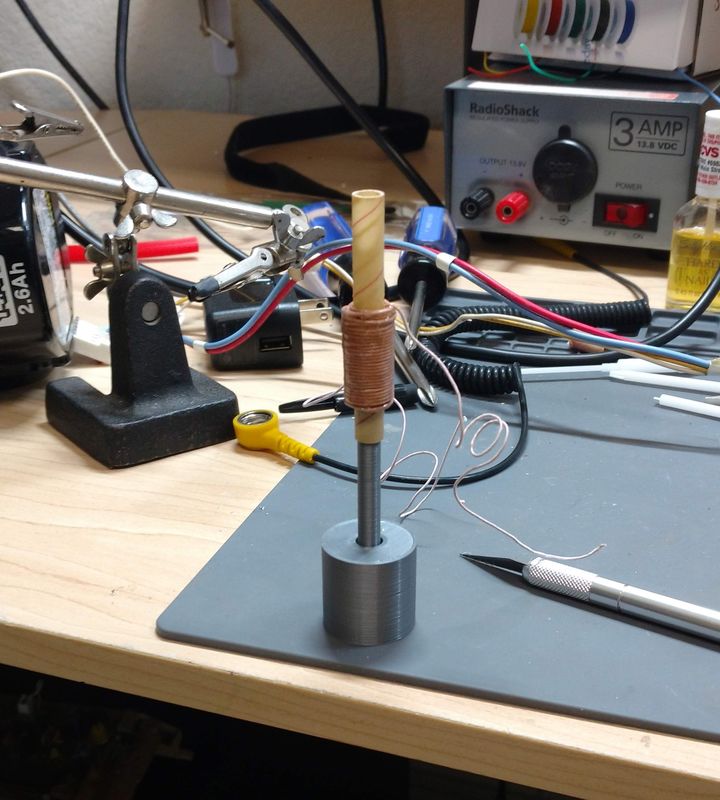
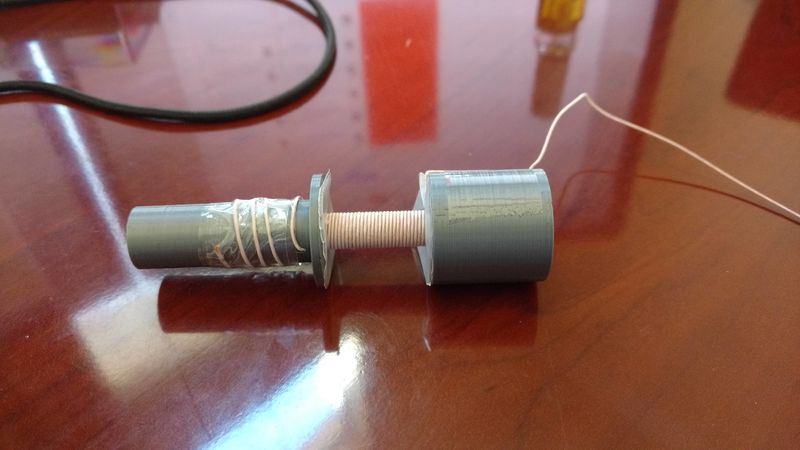
Fully wound and waiting for the coat of nail polish to cure.
Image

This time, because I was able to thoroughly coat each layer, there was no collapse of the end when I took it off the winding form.
Image

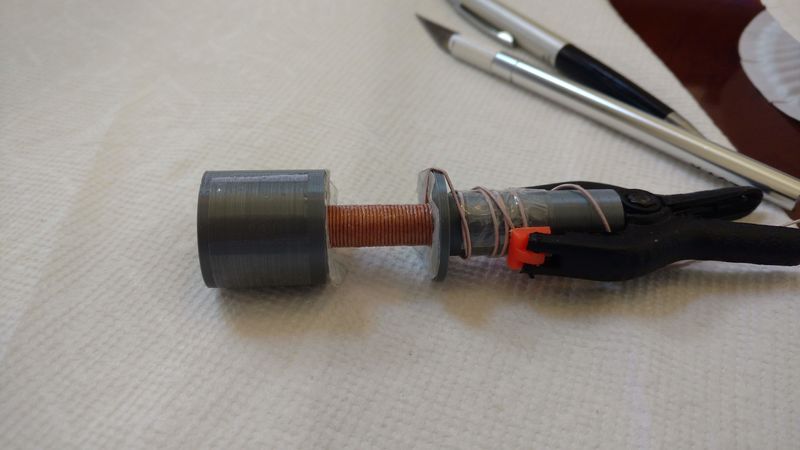
Even so, I went ahead and separately coated the ends of the coil, to help prevent any tendency to unwind while being handled.
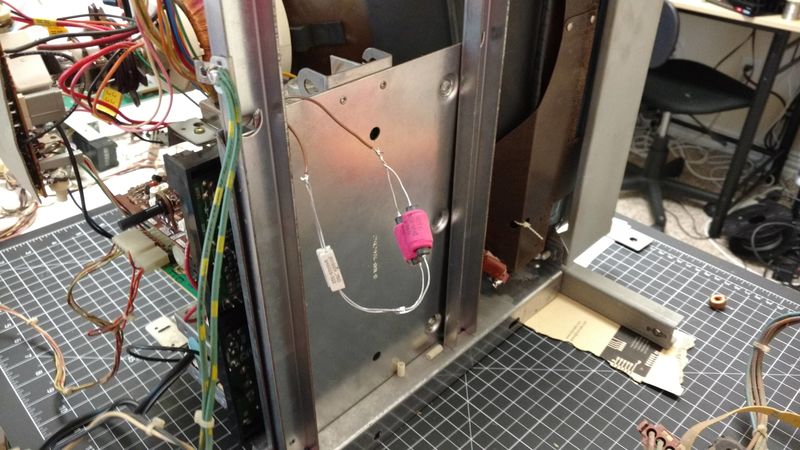
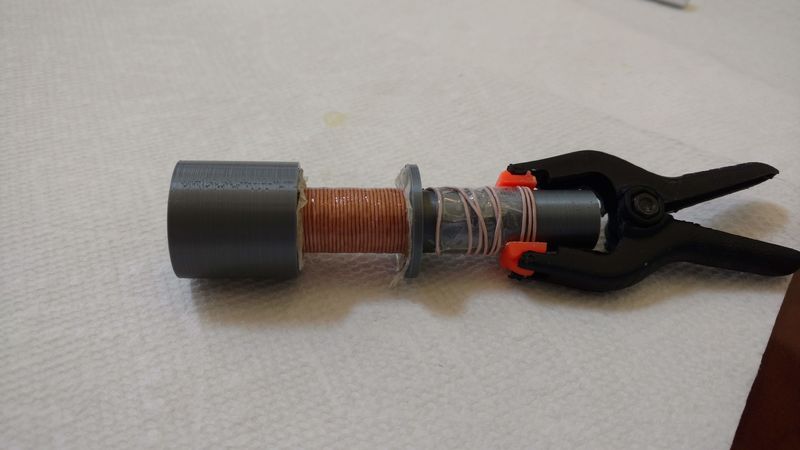
The finished coil.
Image

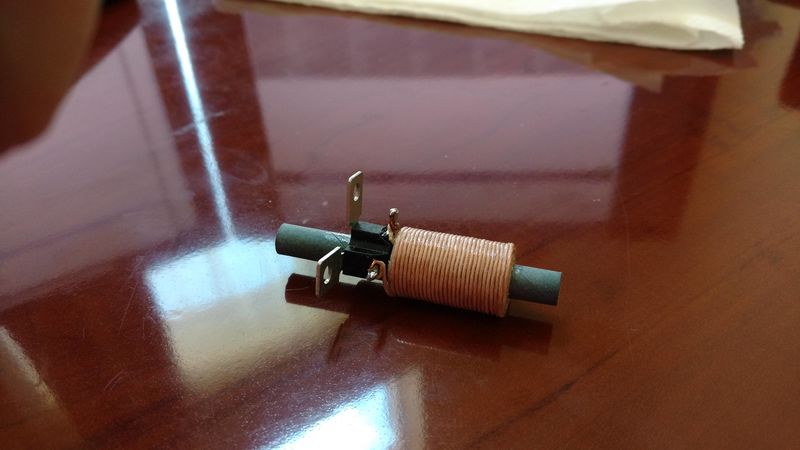
The terminal tabs are a bit big, but I had ready access to them and they work just fine. I wasn't going to go order smaller ones, especially since this is one of those cases where the parts cost is a smaller fraction of the shipping cost.

--SS
 
SecretSquirrel
Minister of Gerbil Affairs
Topic Author
Posts: 2726
Joined: Tue Jan 01, 2002 7:00 pm
Location: North DFW suburb...
Contact:

Re: Stumbled on a new project this weekend.

Tue Apr 23, 2019 6:35 pm

Attempt number #2 yielded a coil inductance around 85uH. I made a note about my initial coil being way lower inductance than desired, with the tuning slug turned all the way in. Same situation with this one. The tuning slug samples I have only allow for around a 3x inductance range. The permeability is just too low. When I was a Tanner's I picked up some other ferrite rod the had. It is designed to be fit over a wire as a noise filter. The outer diameter is significantly smaller, but out of curiosity, I slid one into the coil to see what the impact would be. Inductance was over 550uH, much closer to the 7x range of the stock tuning coil. So now the problem was, how to use this core for my replacement coil?

3d printer to the rescue....
Image

It took a few iterations to get the tolerance right, but I printed a carrier for the core. The outside of the carrier is threaded so that it will screw into the cardboard form, just like a threaded core. It is really at the limits of the printer, with the walls being 0.4mm thick and the threads being 0.3mm high with a 1mm pitch. You can't see it in the picture, but the bottom 7mm is solid with a cutout for a 2mm hex wrench to adjust it. It is strong enough to twist in, even without the ferrite slug and the slug further strengthens things.

So that's where I left things. I took measurements before I left so that I could design the mounts to attach the new coil to monitor frame. Might get to spend a bit of time this evening working on that.

--SS
 
ludi
Lord High Gerbil
Posts: 8646
Joined: Fri Jun 21, 2002 10:47 pm
Location: Sunny Colorado front range

Re: Stumbled on a new project this weekend.

Wed Apr 24, 2019 11:39 am

Are you familiar with 3M DP270-Clear epoxy potting adhesive? The nail polish seems fine enough for these test runs, but once you work out the final coil design, it's likely to become brittle from heat over time. DP270 has an initial viscosity similar to thin syrup and remains slightly flexible after curing.
Abacus Model 2.5 | Quad-Row FX with 256 Cherry Red Slider Beads | Applewood Frame | Water Cooling by Brita Filtration
 
thegleek
Darth Gerbil
Posts: 7460
Joined: Tue Jun 10, 2003 11:06 am
Location: Detroit, MI
Contact:

Re: Stumbled on a new project this weekend.

Wed Apr 24, 2019 10:36 pm

ludi wrote:
Are you familiar with 3M DP270-Clear epoxy potting adhesive? The nail polish seems fine enough for these test runs, but once you work out the final coil design, it's likely to become brittle from heat over time. DP270 has an initial viscosity similar to thin syrup and remains slightly flexible after curing.


Image
––•–√\/––√\/––•–– nostalgia is an emotion for people with no future ––•–√\/––√\/––•–-
 
Convert
Grand Gerbil Poohbah
Posts: 3452
Joined: Fri Nov 14, 2003 6:47 am

Re: Stumbled on a new project this weekend.

Wed Apr 24, 2019 11:07 pm

I'd say he falls into that category :lol:
Tachyonic Karma: Future decisions traveling backwards in time to smite you now.
 
SecretSquirrel
Minister of Gerbil Affairs
Topic Author
Posts: 2726
Joined: Tue Jan 01, 2002 7:00 pm
Location: North DFW suburb...
Contact:

Re: Stumbled on a new project this weekend.

Thu Apr 25, 2019 1:18 am

ludi wrote:
Are you familiar with 3M DP270-Clear epoxy potting adhesive? The nail polish seems fine enough for these test runs, but once you work out the final coil design, it's likely to become brittle from heat over time. DP270 has an initial viscosity similar to thin syrup and remains slightly flexible after curing.


Brittle really isn't that much of an issue. This isn't a part that will undergo mechanical stress once installed. Nor will it see particularly high temps, though I expect 40C is warm enough over time. Whatever they originally used was pretty brittle when I unwound the original coil. Were I winding motor coils or something like that, I'd use a high temp laquer design for the task.
 
SecretSquirrel
Minister of Gerbil Affairs
Topic Author
Posts: 2726
Joined: Tue Jan 01, 2002 7:00 pm
Location: North DFW suburb...
Contact:

Re: Stumbled on a new project this weekend.

Fri Apr 26, 2019 12:57 am

Flying back home tomorrow. May, or may not get a whole lot of sanding done on Saturday, depends on how a morning errand goes.

I obviously haven't gotten to do much this week. I've ordered a new centering grommit for the joystick, to replace the one I had to destroy. Also ordered a set screws, bolts, and nuts for the control panel and coin door. Should be able to start putting those back together soon.

I did get the first pass design for the width coil mount done.
Image

The mounts slide over either end of the coil form and then through the metal brackets on the monitor frame. The "nuts" screw on to hold the mount on the frame. The inside threads of the nut is very slightly tapered so that as it tightens up, it will squeeze the tabs on the mount against the coil form to hold it in place. The taper is extremely small as it don't need much pressure, just enough to keep the coil from sliding in the mounts. I'm guessing it will take 3-5 iterations to get the dimensions and tolerances just right. The thread tolerances have to be spot on for the taper to do its thing, and i'll need to make some adjustments to the threaded tabs to make printability better.

--SS
 
SecretSquirrel
Minister of Gerbil Affairs
Topic Author
Posts: 2726
Joined: Tue Jan 01, 2002 7:00 pm
Location: North DFW suburb...
Contact:

Re: Stumbled on a new project this weekend.

Mon Apr 29, 2019 4:24 pm

No sanding this weekend, for reason's I'll post more about later. I did spend a bit of time last night starting to put the coin door back together. It's not complete yet, but...

Before.....
Image

After....
Image

--SS
  • 1
  • 2
  • 3
  • 4
  • 5
  • 6
  • 9

Who is online

Users browsing this forum: No registered users and 1 guest
GZIP: On